This post was most recently updated on April 6th, 2021
Are you wondering at home? Every Spring the urge for baby chicks kicks in! What is more exciting than incubating and your own chicks?! Follow this DIY step by step guide to build a cheap and effective with a .
Please read: This information is provided for educational purposes only and is not intended to treat, diagnose or prevent any disease. We encourage you to make your own health care decisions in partnership with a qualified health care professional.
This post contains affiliate links, this means at no extra cost to you, we make a commission from sales. Please read our Disclosure Statement
I have built our own for a fraction of what you can buy them for. DIY incubators are notorious for being a great idea, with low success rates, but if you have a source of free fertile eggs it could be worth a try!
Requirements of a
must be held at 37.5C (99.5F) and should be 50-65% during and 70-75% at time.
It is very easy to overheat the eggs in a , and it can be difficult to maintain proper . To get around these issues it is suggested that you should install a fan in your to keep the air moving and you can use a to turn the off and on as required.
Eggs can handle some fluctuation in , as long as the internal of the does not drop too low for too long. If the gets too hot it will kill the and it will stop developing.
It takes 21 days on average for an to once begins, 18 days of 60% and turning at least 3 times per day, the last 3 days you want the to be up closer to 70-75% and stop turning the eggs to allow the chicks to get into optimal positions.
I have used a tray with an , but you can manually turn them three times a day if you prefer.
For full incubation instructions read here
For more on raising chickens read here
Chicken vs Incubator – what is best?
Different types of DIY Incubators
There are several different ways to make your own incubator at home.
Here are a selection of other ways to make your incubator:
Rubbermaid Tote Incubator Plans
Double Cardboard Box Incubator – see below
Styrofoam Cooler Egg Incubator
How to make an incubator step by step for chicken eggs
YOU NEED:
An insulated box – double walled corrugated cardboard box, or two boxes that fit inside each other well
A smaller box to sit inside the larger one/s
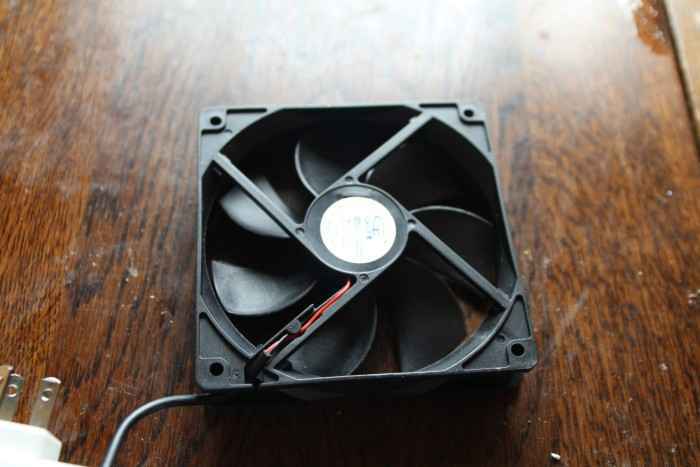
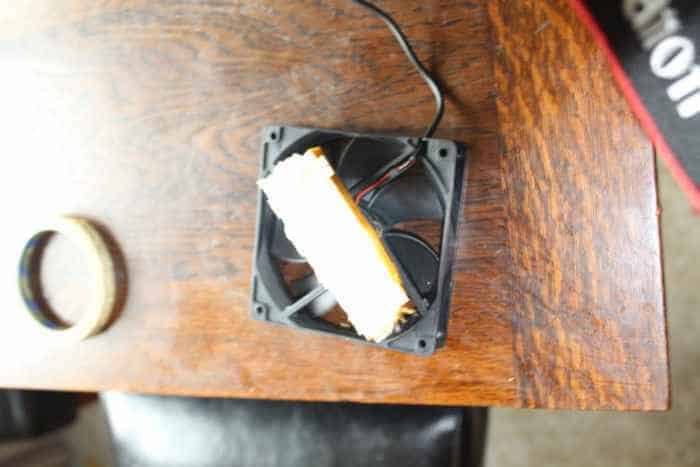
A computer fan – I used a USB one
A light fitting
A 40 watt incandescent bulb
A thermometer and hydrometer
A cup or bowl for water
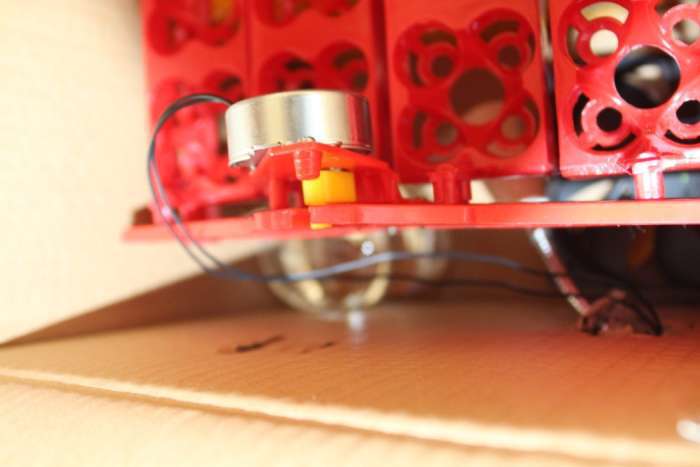
An egg tray and motor (optional)
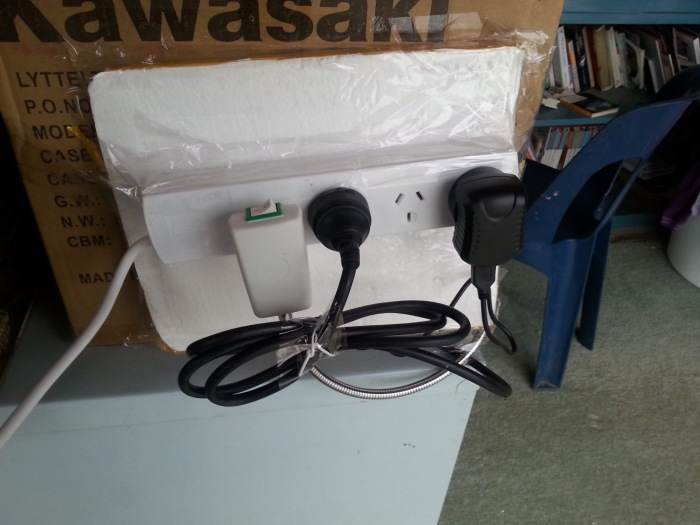
Multibox plug
Tape
Optional – a thermostat
You can buy most of these supplies from Amazon.
Step One
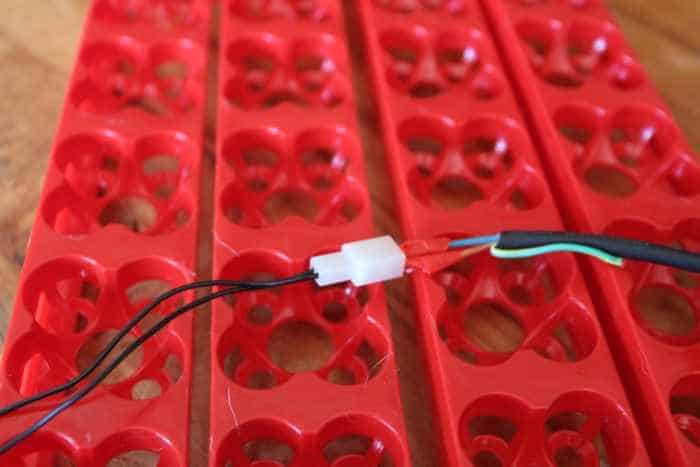
I had to attach a plug to the motor that came with the egg tray, I did this first and made sure it was working.
Step two
I attached some polystyrene to the bottom of the fan using double sided tape to keep it up off of the bottom of the box to increase the airflow.
Step three
I cut a hole in the side of the box to view the thermometer without totally opening the box up.


Step four
The next step is to poke holes in the box and tape on all the plugs, then re-cover all the holes to keep the heat in.

Step five
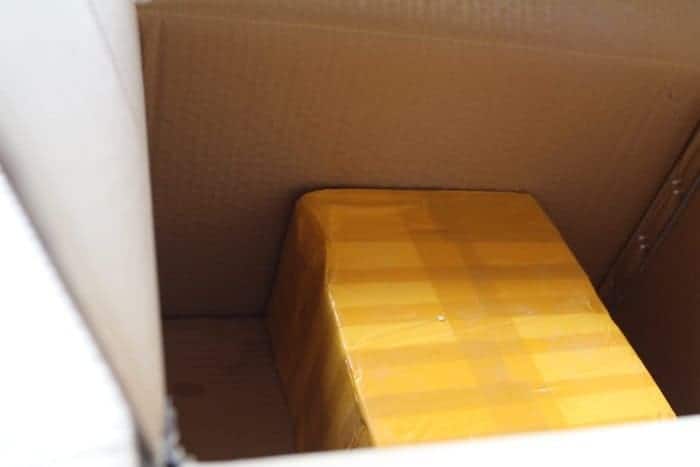
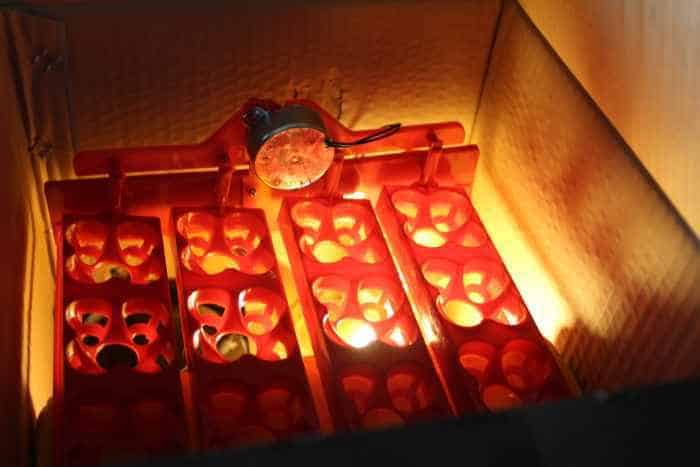
Inside the larger box I placed a smaller box. This will hold the egg tray up away from the light/heat, water and the fan.
On the end where the plugs go in, I sat a glass of water, the fan that is raised off the ground slightly, and the light bulb. On the other side I placed the thermometer, pointing out toward the specially cut window.
Step six
Then on top of the box I balanced the egg tray and motor, attaching it to the end of the box with a little piece of tying wire.
Once you run your DIY egg incubator for 24 hours you will have a better idea of how warm your box will sit at.
You may need to poke holes in the box to lower the humidity or reduce or increase the wattage of your bulb to help with the temperature, two other options are using a dimmer on the light and using a sponge with more or less surface area to adjust humidity.
Once you know you can run it for 24 hours and maintain temperature and humidity you should be ready to add some eggs.
The incubator should be placed in a location with the least possible fluctuation in temperature and humidity throughout the day—a basement is ideal, a sunny window is not.
The First Time we Used Our DIY Chicken Egg Incubator was a DISASTER
So despite me trialing the DIY egg incubator for 24 hours and it holding its temperature well during the trial, we had a disaster!
I moved the box into the laundry and set it up with the eggs and the auto-turner and all went well until I checked in on everyone in the morning to find
1) the temperature was only 35C (we are aiming for 36.5-38.5)
2) the auto-turner was not turning anything – the bolt that held it on to the egg tray thingy had worked its way loose and it was gyrating all by itself in the corner.
SO I covered the box in a warm blanket and walked off for 90 minutes. Then came disaster number 3) – now the box and the eggs were 49C!! ARRRGGG!
After trying and trying to cool the unit and the eggs down, I have had to poke many many holes into the box to drop the temperature and add in another wet rag to re-increase the humidity.
Now it is holding temperature and humidity beautifully. But I murdered my fertile eggs, so I had to add new ones.
I resorted to manually turning the new eggs 3-5 times a day.
Lesson learnt using our homemade incubator:
- Don’t assume it will hold temp after just running for a day/few hours.
- Don’t rely on technology, sometimes it will let you down!
- Don’t cover the box in a blanket to help it heat up and then walk away.
- DIY egg incubators might not be very successful until you get it right
Making a Styrofoam Egg Incubator Plus improvements for a Cardboard Box Incubator
Our cardboard box incubator had a very poor hatch rate, for several reasons (including operator error) so we decided to have another go and see if we could improve our temperature and humidity control.
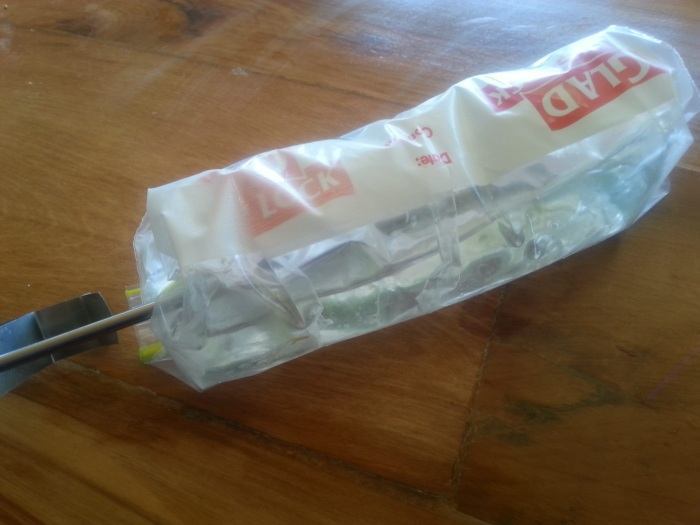
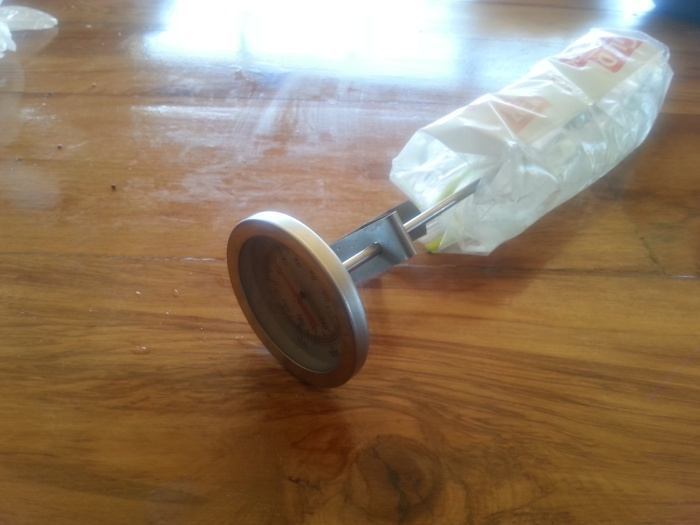
The first thing I did was make my own “water-wriggler” because I am cheap and impatient and didn’t want to buy one.
It is basically a snap-lock bag half filled with water then placed inside of another then taped into a cylinder. In the middle of the water tube I have placed the end of my cheese making thermometer.
This will give me a better idea of the temperature actually inside the liquid of the egg.
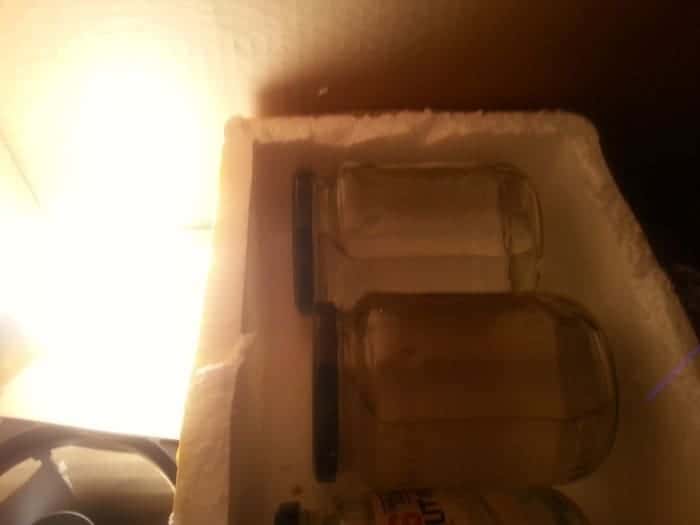
Inside the incubator box I filled two pickle jars with warm water in the box that sits next to the computer fan and light bulb and under my new styrofoam box. These will act as a heat sink and help stabilize the temperature.
To let the heat and fresh air into the styrofoam box I cut two 1 inch holes on the end where the light bulb and the fan are. I also poked a 1 cm square hole on the opposite end to put the thermometer into the water tube through.
I was struggling using a 60W lamp, it was too hot so I had to have lots of holes in the box to let the heat out, so that also let all the humidity out.
So in my 2.0 version I have reduced down to a 40W light bulb and taped over the holes in the outside box.

I cut a hole in the top of they styrofoam box and covered it with the front of an old CD case, and taped it down well. This gives me a window to check the temperature/humidity on my thermometer through.
I have also added a glass jar of water into the top box as a second heat sink.
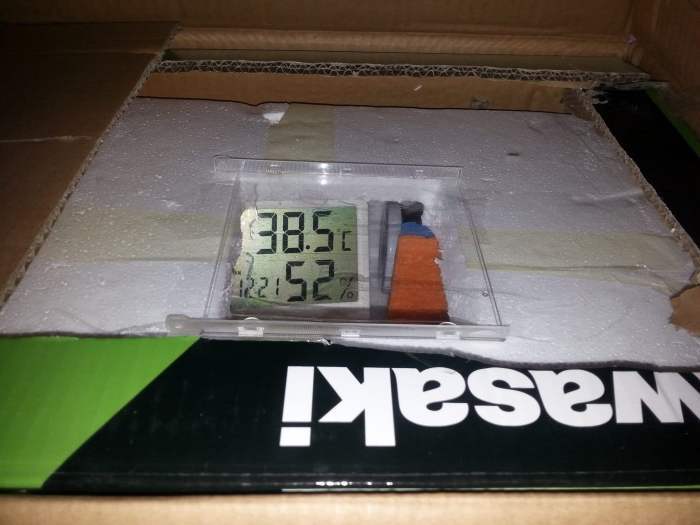
I have found that two sets of two sponges keeps the humidity up, and I have to cover the box at night to keep it warm enough.
I ran the box for a full 48 hours to ensure I could keep the temperature and humidity stable before I added our new batch of eggs.
I poked the thermometer through to the water tube from the outside:


I have given up on our auto-turner for now, I am checking their temperature so often anyway (paranoid much?) So I may as well turn them while I am there.
The styrofoam definitely provided better insulation, and covering the boxes at night helped a lot. If I had kept the egg incubator in the living room where it is warm 24/7 we probably wouldn’t have this issue. But our laundry is on the cold side of the house.
Excitingly these DIY egg incubators did eventually work! We hatched out some very cute fluffy little chicks 21 days later!
We were having trouble keeping the temperature stable, with the eggs closer to the heater dying of too much heat, and the ones on the other side were too cold to develop.
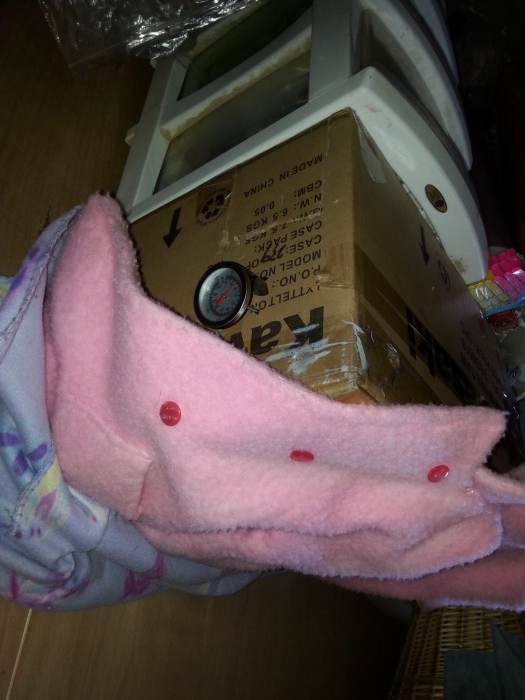
To remedy this, we added a folded towel over the top of the whole incubator, and this had wonderful success!
Update: We ended up giving up on our home made egg incubator and bought a basic 24 egg incubator. We have had much greater success with it.

![]()
What type of material is suitable to put into the ?
A can be made from many different materials. Something that has insulation properties are the best, either thick , styrofoam or a thick wooden box work best.
A is probably the best at maintaining the , so if you can use a polystyrene cooler box that would be ideal.
Secondarily, you will need something that is easy to clean, a makes a fluffy, eggy, shelly mess while , not to mention the poops they produce in the first few hours.
I like to lay a few paper towels in the bottom of the to make clean up easier.
If you are planning on using your also as a , you can add some pine shavings on the floor.
Which is used in ?
You will need an incandescent or a as a for your . A LED or florescent do not give off in the same way.
If your fluctuates widely, a on the is a good idea, to allow it to run while the room is cold and turn off if it is getting warmer.
For a smaller box, a 30-40 watt is about what you will need to keep the box at the right .
Can you supermarket eggs?
No, the eggs from the supermarket are from hens that are kept without a rooster, meaning that they are infertile. are best bought from a breeder or a friend that has a rooster.
You can keep them in an at up to 7 days before you set them in the to incubate.
How to make a kerosene lamp ?
There are instructions around on making a kerosene heated , however, they are very difficult to maintain even in, and they are a higher fire risk. You can buy already made kerosene incubators from Lehmans or follow these instructions here to build your own.
Can you open during ?
Every time that you open the door of the , the and drop sharply. The baby chicks can handle a drop in as they , but the high stops the membrane in their eggs from drying out and sticking to them as they are which can leave the stuck and unable to properly.
Ideally you would only open the a few times each day as the chicks are . A newly hatched can go without food or water for up to 24 hours after , and they will appreciate the warmth of the as they find their strength and get nice and fluffy.
Then you can move a batch of the chicks to the all at once. So unless you need to, try to leave the closed for 6 hours at a time.
What happens if you open the during lockdown?
Lockdown is the period from 18 days of until they . During this time, the eggs are no longer turned, which allows the baby chicks to align themselves properly to . Also, the is increased so as soon as a pips (breaks the shell) they have enough moisture in the air to avoid drying out the shell membrane.
Opening up the during lockdown for a short period will not affect the eggs. If the drops dangerously low (or climbs too high) in this time period, you will likely have catastrophic losses in your unhatched eggs.
What happens if you don’t turn the eggs in a ?
The yolks in the eggs, and the subsequent embryo weigh more than the white, so they do tend to sink within it to the bottom of the shell. The strings that hold the yolk within the white attach to the membranes only at the top and the bottom of the , meaning it can still drift quite a lot from side to side.
A mother hen repeatedly moves and fusses with her eggs several times a day, ensuring that they are moved and rolled often. This helps to center the yolk and embryo, and helps to ensure even and correct development of the .
It is also allowing the embryo to encounter fresh nutrients and oxygen inside the . Turning also moves metabolic wastes way from the embryo. This is especially important during the first week of .
eggs that are not regularly turned have a poor and a high level of deformities.
How many times do you turn an in an ?
Eggs should be turned at least 3 times per day. It should always be an odd number if you are turning them by hand because there will be a longer period of time over night that you will not turn the eggs, and this helps ensure that it is evenly shared between the two sides of the .
To do this you can mark one of the sides of each and simply turn the eggs ‘x’ side up or ‘x’ side down 3 or 5 times per day.
Commercial incubators store the eggs on their end (pointy end down) and the eggs are tipped side to side. To replicate this you can have your eggs in an , and place something a few inches tall under one end of the box, and move this to the other end of the box 3 or 5 times per day.
If you have a mechanical (the best idea) you can set it to turn the eggs every 45-60 minutes for best results.