This post was most recently updated on April 6th, 2021
Incubating eggs at home isn’t difficult, but it is very hard to learn and tweak to get it right. Yesterday our fertilized eggs arrived with the mailman (lady)! This is our first attempt at incubating eggs are we are using our home made incubator, so wish us luck!
Please read: This information is provided for educational purposes only and is not intended to treat, diagnose or prevent any disease. We encourage you to make your own health care decisions in partnership with a qualified health care professional.
This post contains affiliate links, this means at no extra cost to you, we make a commission from sales. Please read our Disclosure Statement
Sourcing and Storing Eggs to Incubate at Home
There are several options when it comes to sourcing eggs to incubate. If you have a rooster running with hens, you probably have fertile eggs of your own that you can use.
Otherwise asking friends, family and neighbours is another good option for getting free or cheap fertile eggs.
Looking in Facebook farming groups, or online sales sites (like Trademe or CraigsList) for fertile eggs to buy is another option. This is often how you can find fertile eggs of specific breeds that you might want to raise.
If you are getting the eggs in the mail, or they are traveling in the car, you should leave your eggs to ‘settle’ by leaving them in their egg carton for 24 hours before setting them to incubate.
Eggs for incubating can be stored with the pointed end down in an egg carton at 10-15C (50-60F) for up to 10 days before incubating them without affecting hatch rate.
This allows you time to collect a number of eggs to set all at once and ensures all the chicks hatch within a day or two of each other rather than spread out over a long period.
Discard cracked, mis-shaped and heavily soiled eggs. Only wash soiled eggs using a branded egg wash solution following the manufacturers instructions. If the eggs are not soiled, then avoid washing them if you can as washing eggs removes the natural bloom/cuticle which leaves it at risk of bacterial infection.
If you have to wash eggs the water needs to be significantly warmer than the egg, this helps prevent the solution getting in through the egg pores.
RELATED POST: Chicken or incubator? Which is best?
Preparing to Incubate
Eggs should always be stored and incubated pointy side down, this has a better hatch out rate than the other way up, or lying flat.
While your eggs are resting in a cool place (we use the laundry), you should set up the incubator and get it running and up to temperature for at least 24 hours before setting the eggs.
Incubator temperature and humidity for chicken eggs
Stable and correct temperature is essential to egg hatching success.
Recommended temperature for chicken eggs are 37.4-37.6C (99.3-99.6F) for 21 days
Developing embryos are pretty tolerant of short term temperature drops, in fact research has shown that allowing egg cooling for up to 2 hours each day can increase your hatch rates. This replicates the time the mother hen hops off the nest and goes to eat/drink.
Temperatures that go above the recommended ranges can kill or harm the developing chick and should be avoided.
Controlling humidity in an incubator
Short term variations in humidity are not an issue. The average humidity over the incubation period is what matters. Eggs need to lose about 13-16% of their weight in water loss over the course of the incubation.
The best way to check if your humidity levels are correct is to chart your eggs weights every 3 days and check that they are losing weight steadily. To do this, before setting the eggs weigh them all and work out the average.
Place this on a graph with grams up the left axis and 21 days along the bottom axis. Draw a straight line from the current weight to 13% less. Then when you compare weights every 3 days you can tell if you are over or under hydrating them and adjust as required.
For chickens humidity is usually between 40-50% for the first 18 days, then it is increased to 60-70% . Humidity for hatching needs to be high to prevent the membranes sticking to the chick and killing it while it is trying to hatch.
During hatching the humidity levels will drop quickly everytime the door is opened on the incubator, so it is best to leave it closed and minimise the number of times that you open it during the hatch.
Chicks can go up to 48 hours without food and water as they still have some yolk to live off of when they hatch, so don’t rush to remove them from the hatching trays.
Incubator temperature and humidity for other birds
Different birds need different temperatures, humidity and length of incubation. The below are the commonly accepted levels:
Pheasants:
Temperature 37.6-37.8C (99.6-100F) 23-27 days
Humidity 40-50% for the first 20 days, then it is increased to 60-70%
Quail:
Temperature 37.6-37.8C (99.6-100F) 16- 23 days
Humidity 40-50% for the first 14 days, then it is increased to 60-70%
Ducks:
Temperature 37.4-37.6C (99.3-99.6F) for 28 days
Humidity 45-55% for the first 24 days, then it is increased to 60-70%
Geese:
Temperature 37.4-37.6C (99.3-99.6F) for 28-32 days
Humidity 45-55% for the first 24 days, then it is increased to 60-70%
Setting Eggs to Incubate
Once the incubator is up and running, and nice and warm, it is time to add the eggs.
Place the eggs in the trays pointed side down, or if you have no trays, allow them to lay flat.
Do not adjust the temperature of the incubator for the next 24 hours as the eggs are coming up to temperature.
Eggs should be turned at least 3 times per day. You can either do this manually, or invest in an egg turner.
Candling Incubating Eggs
One third through the incubation period it is a good idea to ‘candle’ your eggs. This is simply holding a bright light to the shell of the eggs in a dimly lit/darkish room to check on progress. Any eggs that have not developed can be removed from the incubator to avoid them going rotten and exploding.
RELATED POST: How to raise chicks
Lockdown when Incubating Eggs
4 days before your eggs are expected to hatch you put the incubator in to lockdown. For chickens this is on day 18. Lockdown is where you remove the automatic turning system and leave the eggs unturned and in high humidity. This allows the chicks to position themselves for hatching.
Hatching
You will notice what is called a pip – the first chip out of the egg, or you may hear them peeping from the egg. Usually a chick will quickly peck a row right around the ‘zip line’ where the air space and the chick meet.
Chicks are small and hatching is hard work, sometimes they then need a nap before finally pushing themselves out of their egg shell.
Leave the chicks in the incubator for at least an hour to find its feet and fluff up before moving them to the brooder.
Helping Chicks Hatch
A chick may pip and then not progress any further for up to 24 hours, this is normal and OK
Ideally you would just leave nature to take its course, and let the chick hatch when it is ready. Some chicks pip too early and are not yet fully formed, if you help them to hatch then, they may still have some egg yolk on the outside of their body and a wide open belly button, these chicks usually die of infection if they are forced out of their eggs too early.
If you do need to help a chick out (if your humidity is not high enough and the chick takes too long to hatch you may notice the membranes have gone hard and brown. This usually means that it is also stuck to the chicks feathers inside the egg and that they can no longer rotate to peck more of the egg off.
Dabbing with a little warm water can be enough to moisten the dry membrane enough to let the chick finish hatching by itself. If it is not enough, you can CAREFULLY work your way around the zip line chipping small pieces of shell off. If the membrane starts to bleed, it is not ready yet, place it back in the incubator and try again in an hour or so.
Troubleshooting Incubating Eggs
Sometimes your incubations simply doesn’t work well. There are some things that you can look for to improve for next time.
We have found that homemade and cheap incubators have a much lower hatch rate than large commercial incubators. This seems to largely due to poor temperature and humidity regulation.
No chicks hatch
Likely causes: Infertility, infection, very incorrect incubator settings, parental ill health
Solutions: Check egg viability – are similar eggs hatching well under a mama hen? Check your incubators settings. Before setting more eggs be sure to disinfect your incubator.
Chicks hatch early or deformities
Likely causes: Incubator temperature too high
Solutions: Reduce temperature slightly by .5C or 1F
Chicks hatch later than expected
Likely causes: Incubator temperature too low
Solutions: Raise temperature slightly by .5C or 1F
Chicks hatch over a wide number of days
Likely causes: Different rates of development due to different storage times, or incubator temperature variation
Solutions: Limit egg storage times to less than 7 days total. Check for causes of temperature variation – sunlight, near a heater etc
Late stage death (days 15-21)
Likely causes: Incorrect humidity, probably too high before day 18 (needs to be high after day 18)
Solutions: Try reducing average humidity levels before day 18
Death during hatch
Likely causes: Chick stuck to membrane and unable to turn due to low humidity
Solutions: Keep humidity over 60%
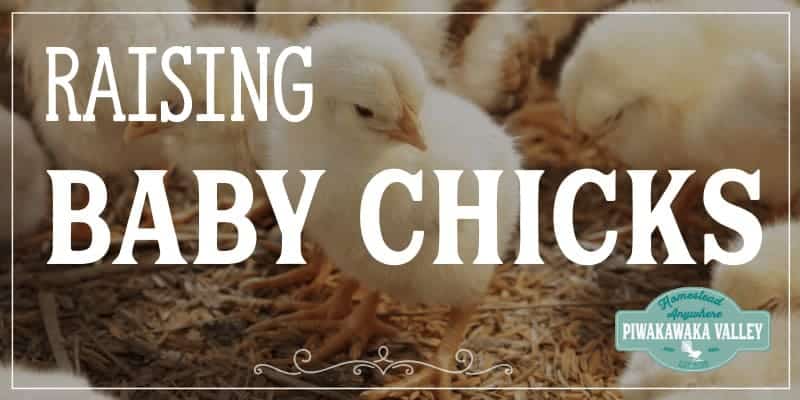
Once your chicks are hatched, read here on how to raise your baby chicks.
If you like tips on frugal living, self sufficiency and consuming less, sign up to our newsletter below, I would LOVE to have you!