This post was most recently updated on January 31st, 2022
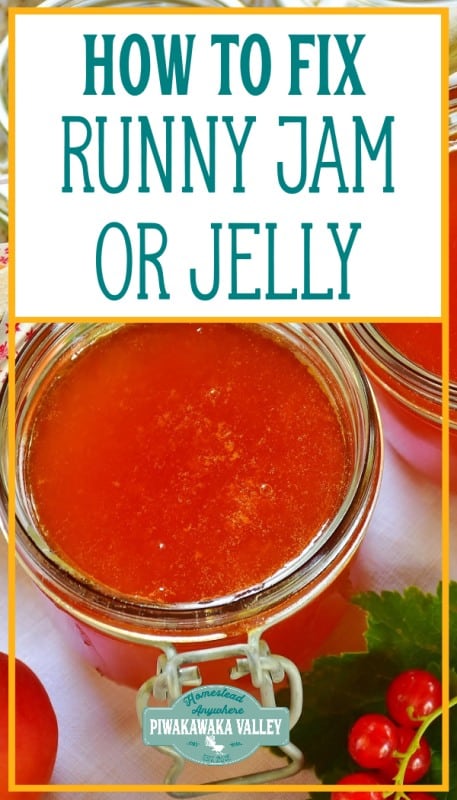
Nothing beats a thick slab of on a well made peanut butter and sandwich. But that’s all ruined if the isn’t set enough. Luckily, if you make a runny batch of jam or , you can fix it. Here are a few tips to help you reclaim your jam with these great tips on how to fix jelly that didn’t set.
Please read: This information is provided for educational purposes only and is not intended to treat, diagnose or prevent any disease. We encourage you to make your own health care decisions in partnership with a qualified health care professional.
This post contains affiliate links, this means at no extra cost to you, we make a commission from sales. Please read our Disclosure Statement
Jam vs Jelly what is the difference?
A jam is made with the whole fruit (minus the bits you don’t eat like stones and stalks).
A jelly is made with the juice of a fruit with the pulp removed. Some recipes call for boiling all the ingredients together and then straining the fruit pulp out, and others call for you to extract the juice from the fruit first before cooking.
But first, why didn’t your jam or set?
There are a few causes for or . Usually the cause of jam or not setting up is either not following the recipe correctly, not enough be it either naturally occurring or added, or not cooking the jam out long enough.
RELATED POST: Mulberry Recipe
Why Did My Jelly or Jam Not Set?
Some of the reasons why jam won’t set include:
Not enough
is not just for making the sweet. It has a significant role in the setting process too. Therefore, if you use less than the recipe calls for, the jam will be runny.
Try to use granulated or jam . If you use Splenda, Truvia, or any other substitute, remember to adjust the (use more). Both and will work, but be sure to follow the directions on the packet.
Wrong measurements
If the calls for a weight of , it’s talking about the prepared , ready to cook.
If you measured your before you prepared it for cooking; you’ll have way less than you need by the time you have prepared it. That could be the reason for the watery jam.
Too little
‘s the stuff that makes the jam gel together. Some fruits contain enough natural and do not need more to be added, others need either high fruits to be added to the , and other recipe instructions call for bought powder or . Be sure to follow the recipe.
You either use the store-bought or the natural one found in seeds and peels. If your jam doesn’t set, it could be because you didn’t put enough . Some fruits like citrus have more of it than other fruits. Thus, when you are working with lower fruits, you need to add more of it.
Too much
Some fruits have more , and the recipe should account for this. Therefore, if you add too much to watery fruits while you cook them down – the result can be a .
Over or undercooking
Another reason why jam won’t set is either you are not cooking it enough or overcooking it. If it doesn’t get a sufficient amount of heat, the won’t set. On the flip side, if it overheats and destroys the , it still won’t set so be sure to follow the recipe closely.
It’s not yet cool
The jam needs to cool down fully before it sets properly. So it might be that you checked too early, allow it to cool for a full 24 hours before deciding if it is really too runny.
Too much
Did you double the recipe to make more? That could be the problem. If you put a lot of in one pot, the fruits and will cook unevenly. If you want to make a massive batch, use a very large pot and stir it often to cook it evenly.
The weather
When it’s raining or humid out, jam tends to not set well.
Here’s How To Fix A Jelly That Didn’t Set
If your jelly or jam hasn’t set up, there are some steps you can take to fix or jams. The solution does depend on the cause in the first place. If the jam is still warm, it might just need to cool, otherwise sometimes re-cooking the jam will be enough to make it set again.
Give it time
It’s entirely possible that you need to wait a little longer. It can take more than a day for your jam to set. Store it in a cool place and wait.
If you are in a bit of a hurry, you can pop it in the refrigerator for a couple of hours. That should help it set faster. Once it sets, you can take it out, and it should be ready for that sandwich.
Cook it again
Put your jam back in the pot and start over, it won’t take too long this time. Bring it to the boil and simmer it until a small amount placed on a cold plate wrinkles when you push it with your finger once it is cool.
Add in (the store kind)
You can put more as you recook – add between 1 to 4 teaspoons to your batch.
Add in (the natural kind)
Most of the in is in the peels and seeds. You can add these bits to the instead of throwing them away. Wash them thoroughly. Then add and let it boil until it sets.
Remember to remove any bits and pieces before you bottle, or else it will make your jam bitter. If you don’t want the added hassle of removing the bits of pieces, put them all in an easy to remove muslin bag.
Mix with rich jam
Seeing as some fruits have more than others, you can use that to your advantage. Make a new batch of jam using a pectin-rich fruit like guava, oranges, or apples ( if you don’t already have one). Next, mix the two jams and recook until it’s no longer runny.
make with seldom needs extra , but some berries need it added, , or will often need additional , whereas or seldom needs additional .
Without
Pour the jam back into the pot and reduce the heat but keep the at a to get rid of excess . Don’t add anything. Watch it closely, it can catch on the bottom of the pot and burn, and if you cook it too long, the can start to caramelize which totally changes the flavor.
Add more
You can pour in more instead. The citric acid in helps the setting process; as little as a teaspoon (or half) for every 4 cups of syrupy jam will do. Then bring the jam to boil again until it’s close enough to set. is just as effective as freshly squeezed in this situation and it is usually cheaper and easier to measure.
How To Tell If Your Jam or Jelly Is Cooked Enough And Ready To Set
You don’t want to have a syrupy jam re-run after recooking. Here is how you can tell if your jam’s ready.
When you start preparing the , put a few clean small plates in the freezer. If you think your jam is cooked enough (should be thick and simmering down to sizzle, not a vigorous boil), put a little on one of these chilled plates and look out for these things:
Firstly, if it’s runny or watery, it’s not yet done. It shouldn’t flow on the plate, and you shouldn’t see any .
Secondly, after it sits for a few minutes, gently poke at it with your finger. If it looks like it’s forming a gel-like substance, it’s ready.
Thirdly, check if it’s forming a skin on the surface. This will look like a transparent, almost peelable layer.
Finally, push the blob with your finger. When the jam sets, you’ll be able to move your finger right through, forming a wrinkly path.
If it doesn’t pass the plate test, keep stirring and try again after a few minutes. Take the pot off the heat when you’re testing, just in case it’s done. You wouldn’t want to overcook and then end up with (again!)
As soon as it is ready you can pour it into your hot and seal them. You may like to then process the jars for 15 minutes in a , this helps lengthen their shelf life and reduce the risk of them spoiling.
Oven “bake” your jam
Put the jam in a baking tray and bake at until it looks thick enough. Just be careful not to leave it too long. Otherwise, you’ll get an unplanned super sweet fruit pie for dessert or a fruit paste to have with cheese and crackers!
Use cornstarch
You can use cornstarch to give it a thicker consistency. Put the jam back in the pot, add the cornstarch and stir until it’s thick enough.
Approximately one spoon of cornstarch for every cup of jam should do. If it still doesn’t thicken, add more. The cornstarch won’t change the taste of the jam, but it might affect the color and its shelf life.
Add chia seeds
A tablespoon of ground chia seeds for a 200g/7 to 8-ounce will help thicken it. Chia seeds will act as a gel to bind the jam together.
If you don’t mint a gritty jam variant, you can add the unground seeds. They’ll do the same job, just with more texture. Chia jam doesn’t have the same shelf life as non chia jam does, so it is best stored in the fridge.
Add
can help give it a wobbly -like consistency, more like a jello. Dissolve the in hot . 1 or 2 teaspoons will be enough. Then heat the jam, take it off the stove, mix the jam and well and then add to their jars. After it cools, refrigerate.
When you take it out, it will be a thick, spreadable consistency. With this option, you have to remember to keep the jam refrigerated between uses so it won’t separate.
If you’re a vegan, you can use agar-agar (a Japanese -like powder from a seaweed) instead of .
Tips For Jam Making; Avoid Making That Won’t Set!
The kitchen is fun. But with the amount of time it takes to make and jam, it’s no fun having to do it again. Here a couple of tips to help you get it right the first time.
• Use a candy thermometer to check the temperature as you cook. Aim for about 104C or 220 degrees Fahrenheit. Higher or lower temperatures can affect the setting.
• Get the widest pot you can. A wider pot will distribute the temperature evenly and improve evaporation.
• Stir your spatula in the same direction. Choose clockwise or anticlockwise and stick with it- try not to interchange. This helps ensure even cooking.
• Only skim the frothy white stuff off the surface when it’s done cooking, not before.
What Can You Do With ?
Sometimes, besides your best efforts, it still won’t set. Don’t feel bad, it could be the weather! Simply call it what it is – a syrup- and use it for something else.
For starters, this may make an excellent glazing recipe for your baking projects. You might even use the jam to flavor your cakes or muffins.
Pour it over and eat it on crackers or use it as a yummy syrup for your pancakes or . Or as a sauce for your desserts.
Conclusions on how to fix that didn’t set
There are several reasons why the or jam won’t set, some of them are beyond your control. If this happens to you, try recooking or any other of these methods to fix the jam. If none of it works, enjoy your syrup!