
This post was most recently updated on May 11th, 2021
Canning apples without sugar is not only possible, but considered safe by the USDA. If you are wondering how to can apples without sugar, you have come to the right place. Below are step by step instructions on canning fruit without adding sugar, a video to guide you through step by step and some additional troubleshooting tips for preserving your apples safely.
Please read: This information is provided for educational purposes only and is not intended to treat, diagnose or prevent any disease. We encourage you to make your own health care decisions in partnership with a qualified health care professional.
This post contains affiliate links, this means at no extra cost to you, we make a commission from sales. Please read our Disclosure Statement
Can you bottle fruit without sugar? Canning apple slices without sugar is a simple and effective way to preserve apples without adding more sugar to your diet.
You can also use the directions below for canning homemade applesauce without added sugar.
Can you can without sugar?
All fruits can be safely canned or bottled without adding sugar. While sugar helps hold the texture, shape and color of fruit, it is really mostly added for flavor.
You can safely can all fruits in water or alternatively in fruit juice by following reliable canning directions for preparing and processing the fruit. Sugar is not needed to prevent spoilage when canning fruit, including apples and pears (1).
How to can apples without sugar
Here are the steps you should take to can apples without using sugar. Below is also a step by step video to help you.
‘
1. Choose your apples
Often when you have access to a large number of apples you do not get to choose what variety they are, you just get offered or given them. However, if you have the chance to choose your apple varieties, there are some that will give you a much better result once canned than others.
Quantity of apples required
An average of 19 pounds (8.5 kg) is needed per canner load of 7 quarts (7 1L jars); alternatively for smaller jars 12 pounds (5.5kg) is needed per canner load of 9 pints (or 9 500ml jars).
What are the best apples for canning?
Because preserving apples without sugar can affect their ability to stay looking pretty when canned, it is extra important to choose good quality fruit when you bottle your apples without added sugar or a sugar syrup. Overripe fruit will soften too much, and bruises will only darken and look worse once preserved.
When canning apples, choose a crisp, not mealy, apple variety. Tart apples such as Fuji, Braeburn, Jonagold, Granny Smith, Golden Delicious, Pink Lady, Jazz, Honeycrisp, and Cortland are good choices for canning.
Apples fall in to several types depending on what they are good for:
Cider apples are super tart and high in apple flavor but are not pleasant to eat fresh, however they are great for apple juice or hard apple cider.
Dessert apples are sweet and juicy, perfect for eating off the tree, they vary in their ability to store, but they are wonderful for fresh apple slices.
Cooking apples are usually a little tart, full of flavor and turn to a fluffy, dry mush when you cook them, perfect for making apple sauce or apple butter or for a baked apple.
Pie apples are firm and a little tart and they hold their shape when they are cooked, perfect for apple pie!
2. Prepare your apples for canning
Wipe your apples clean if they look dusty or dirty. If you are saving the skins to make apple cider vinegar, avoid scrubbing them clean as you will need the natural yeasts on the skin to kick start the fermentation process.
Peel, core and cut your apples in to slices. Personally I use this gadget to make this MUCH faster. Add your cut fruit to a pot that has acidified water in it.
How do you keep apples from turning brown when canned?
To prevent browning of your apples once they are canned, you need to stop them browning while you are processing them as well. To do this you should add the peeled and sliced apples into an acidified water bath as you work.
Add your cut pieces in a solution of water and ascorbic acid, citric acid or lemon juice. Use either 1 teaspoon ascorbic acid, 1 teaspoon citric acid or 3/4 cup lemon juice to each 1 gallon (4 liters) of water.
You can use this water to simmer your apples in before canning them, and use it also to top up your jars with. This will ensure that the canned apples are still slightly acidic in the jars and help prevent any further browning during storage.
3. Prepare your jars
Using either pint or quart sized jars (or 1/2 L or 1L) designed for canning. Check over your jars are discard any with stress fractures (crack) or chips along the rim. Ensure you have enough seals and bands that fit correctly.
Give your jars a good clean and then place them in a tray or dish with sides.
Heat your oven to 200F/100C and put your jars in for 10 minutes to warm up. Avoid over heating the glass as it can shatter when you add the hot fruit, however, add hot fruit to cold jars will have the same effect.
Check with your seals packaging – if they need pre-heated place them in a bowl and pour over boiling water.
Place your waterbath canner on to heat with enough water in it to cover your jars plus an inch over the top of them.
You can use a tall pot with a wire rack in the bottom, a pressure canner without the rocker on the top or a proper waterbath pot. Don’t use a ceramic plate in the bottom of the pot, it will crack – ask me how I know…
RELATED: Easy canning beetroot
4. Simmer your fruit
Place your pot of apple slices on to the stove and bring it to the boil, simmer for 1-2 minutes and remove it from the heat.
5. Fill your jars
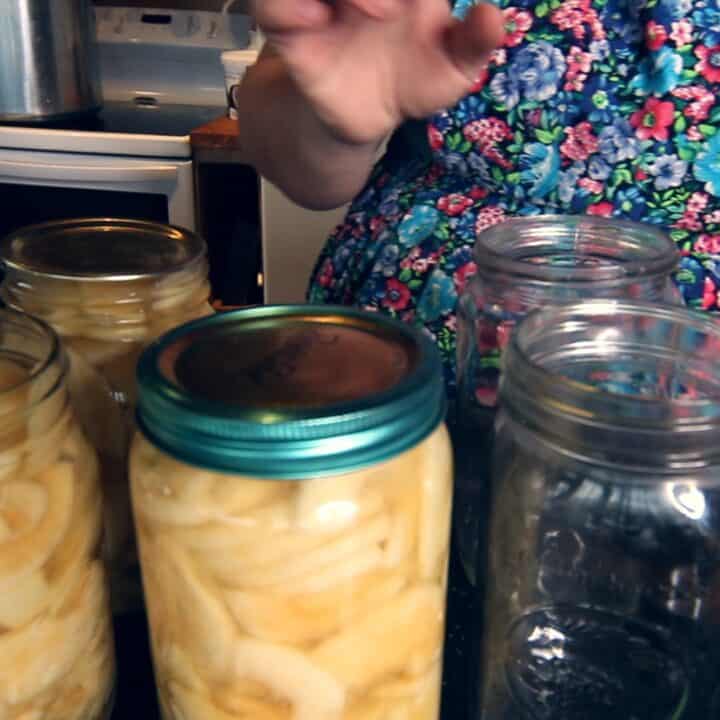
Carefully remove your jars from the oven and place them on the countertop.
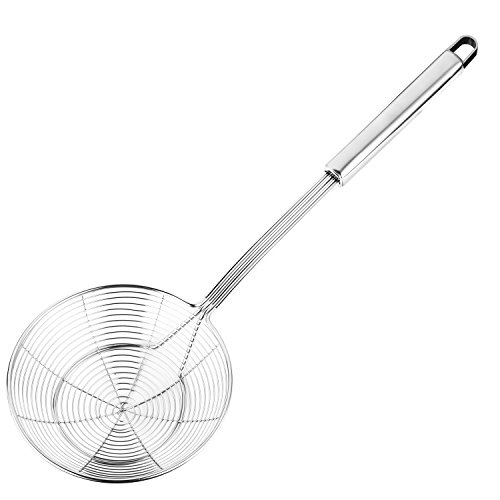
Use a canning funnel and a slotted spoon to fill your jars to 1 inch from the top of the jar with your cooked sliced apples. If you like you can add a cinnamon stick or some ground cinnamon to each jar.
6. Add the cooking liquid
Top your gaps in the jars up with the hot cooking liquid. Run a knife around the sides of the jars to release the air bubbles, and add additional liquid from the pot to top back up to 1/2 inch/1.5cm from the top of the jar.
If you do not have enough liquid, add hot water from a freshly boiled kettle or heated apple juice.
7. Place your seals and lids on
Carefully wipe the top rim of your jars with a clean cloth and add your seals and bands. Be careful because the jars are hot.
Tighten the bands to “finger tip tight” where you just use your finger tips to tighten the bands down rather than the strength of your entire arm.
8. Place in the water bath
Carefully lower the jars into the hot water bath. Ensure the water comes up 1 inch or so over the top of the jars. If it doesn’t then add more water from a freshly boiled kettle/jug of water.
Place the lid on the pot and boil for 20 minutes if you are under 1000ft/300m of altitude. See the table below for further times.
| Recommended process time for sliced apples in a water bath canner | |||||
| Process time at altitudes of: | |||||
| Style of pack | Jar size | 0-1000ft | 1001-3000ft | 3001-6000ft | |
| (0-300m) | (301-900m) | (901-1800m) | |||
| Hot | pint/500ml | 20 min | 25 min | 30 min | |
| Hot | quart/1000ml | 20 min | 25 min | 30 min | |
Pressure canning apples without sugar
Pressure canning is what is used to preserve vegetables and low acid foods. Strictly speaking apples without sugar do not need to be pressure canned, and they may end up softer than you expect, however it is a good way to ensure they are well preserved.
If you choose to pressure can the apples, you can do it at 5lb of pressure if you live under 1000ft/300m or 10lb of pressure if you live above that. All elevations cook for 8 minutes once pressure has been reached.
9. Remove and allow to cool
Using a jar lifter, carefully lift your jars from the water and place them on a folded towel or wooden board and allow them to cool completely. Ensure there is a gap around each jar so that they are not touching each other, this will help to ensure they cool evenly and thoroughly.
10. Store
Once the jars are totally cold you can remove the bands and check the seals of the jars. Any jars that did not seal need to be re-processed immediately or stored in the fridge and used within a week.
Label your jars clearly with what is in them and the month/year and place them in a cool, dark area to store.
Apples preserved this way will last at least a year. Be sure to periodically check the jars to signs of spoilage or failed seals. If this occurs, it was probably a false seal (looked sealed but actually wasn’t) and in this case the contents should be discarded.
Using stewed apples
Your canned apples can be used in any recipe that calls for stewed apples or you can use an immersion blender and turn your canned apples in to quick and easy apple sauce.
Canned apples make a wonderful apple pie filling or it can be cooked down further in a slow cooker to make apple butter at a later date.
How does sugar preserve fruit?
Sugar is used in the canning and freezing of fruits to improve flavor and texture, and to preserve natural color and shape. However it does not make the fruit actually last any longer – this is decided by the preservation method you choose to use.
The high osmolarity of sugar syrup preserves the fruit’s inherent color, texture and shape by preventing the fruit’s remaining water from leaving its cellular structures.
Can you preserve apples with a non sugar sweetener?
Cup to cup pouring sugar substitutes like Splenda are the only sugar substitutes that you can use in place of sugar when making a preserving or canning syrup used to cover the fruit in the jars. You will want to experiment to determine your preferred level of sweetness. Alternatively you can can your fruit without additional sweetener, and simply add the sweetener later when you are wanting to use the preserved fruit.
You should stay away from using saccharin and aspartame based sweeteners when canning as neither are suitable for what you need. Saccharin sweeteners turn bitter when processed. Aspartame loses its ability to sweeten during the canning process.
Can you use maple syrup or honey to can fruit?
Because the sugar does not add to the preserving properties of canned fruit, you can replace these with honey or maple syrup to taste. However, if you want to get the same colour and texture of sugar preserved apples, you should only replace up to half the sugar in your sugar syrup recipe with your alternative sugar options.
How to can apples without sugar
Canning apples without sugar is safe as long as you follow these directions carefully.
Ingredients
- 19lb or 8.5kg of apples for 7 quart/liter jars
- 2 teaspoons of citric acid or ascorbic acid
Instructions
1. Choose your apples
Often when you have access to a large number of apples you do not get to choose what variety they are, you just get offered or given them. However, if you have the chance to choose your apple varieties, there are some that will give you a much better result once canned than others.
Quantity of apples required: An average of 19 pounds (8.5 kg) is needed per canner load of 7 quarts (7 1L jars); alternatively for smaller jars 12 pounds (5.5kg) is needed per canner load of 9 pints (or 9 500ml jars).
2. Prepare your apples for canning
Wipe your apples clean if they look dusty or dirty. If you are saving the skins to make apple cider vinegar, avoid scrubbing them clean as you will need the natural yeasts on the skin to kick start the fermentation process.
Peel, core and cut your apples in to slices. Personally I use this gadget to make this MUCH faster. Add your cut fruit to a pot that has acidified water in it.
3. Prepare your jars
Using either pint or quart sized jars (or 1/2 L or 1L) designed for canning. Check over your jars are discard any with stress fractures (crack) or chips along the rim. Ensure you have enough seals and bands that fit correctly.
Give your jars a good clean and then place them in a tray or dish with sides.
Heat your oven to 200F/100C and put your jars in for 10 minutes to warm up. Avoid over heating the glass as it can shatter when you add the hot fruit, however, add hot fruit to cold jars will have the same effect.
Check with your seals packaging - if they need pre-heated place them in a bowl and pour over boiling water.
Place your waterbath canner on to heat with enough water in it to cover your jars plus an inch over the top of them.
You can use a tall pot with a wire rack in the bottom, a pressure canner without the rocker on the top or a proper waterbath pot. Don't use a ceramic plate in the bottom of the pot, it will crack - ask me how I know...
4. Simmer your fruit
Place your pot of apple slices on to the stove and bring it to the boil, simmer for 1-2 minutes and remove it from the heat.
5. Fill your jars
Carefully remove your jars from the oven and place them on the countertop.
Use a canning funnel and a slotted spoon to fill your jars to 1 inch from the top of the jar with your cooked sliced apples. If you like you can add a cinnamon stick or some ground cinnamon to each jar.
6. Add the cooking liquid
Top your gaps in the jars up with the hot cooking liquid. Run a knife around the sides of the jars to release the air bubbles, and add additional liquid from the pot to top back up to 1/2 inch/1.5cm from the top of the jar.
If you do not have enough liquid, add hot water from a freshly boiled kettle or heated apple juice.
7. Place your seals and lids on
Carefully wipe the top rim of your jars with a clean cloth and add your seals and bands. Be careful because the jars are hot.
Tighten the bands to "finger tip tight" where you just use your finger tips to tighten the bands down rather than the strength of your entire arm.
8. Place in the water bath
Carefully lower the jars into the hot water bath. Ensure the water comes up 1 inch or so over the top of the jars. If it doesn't then add more water from a freshly boiled kettle/jug of water.
Place the lid on the pot and boil for 20 minutes if you are under 1000ft/300m of altitude. See the table above for further times
9. Remove and allow to cool
Using a can lifter, carefully lift your jars from the water and place them on a folded towel or wooden board and allow them to cool completely. Ensure there is a gap around each jar so that they are not touching each other, this will help to ensure they cool evenly and thoroughly.
10. Store
Once the jars are totally cold you can remove the bands and check the seals of the jars. Any jars that did not seal need to be re-processed immediately or stored in the fridge and used within a week.
Label your jars clearly with what is in them and the month/year and place them in a cool, dark area to store.
Apples preserved this way will last at least a year. Be sure to periodically check the jars to signs of spoilage or failed seals. If this occurs, it was probably a false seal (looked sealed but actually wasn't) and in this case the contents should be discarded.
Recommended Products
As an Amazon Associate and member of other affiliate programs, I earn from qualifying purchases.


Thank you excellent video. Learned a lot! And I do love your apron!