This post was most recently updated on April 7th, 2020
Have you ever found yourself searching for ways to use an over-abundance of blackberries? That even after making jams and syrup, after freezing and preserving blackberries in every manner you can possibly think of, you still have more ripening in the berry patch?
Please read: This information is provided for educational purposes only and is not intended to treat, diagnose or prevent any disease. We encourage you to make your own health care decisions in partnership with a qualified health care professional.
This post contains affiliate links, this means at no extra cost to you, we make a commission from sales. Please read our Disclosure Statement
Today, I’m going to help you solve this problem by teaching you how to make blackberry vinegar from scratch! Here’s a step by step breakdown of the process!
Today’s blog post is brought to you by Autumn Rose from atraditionallife.com
How to Make Blackberry Vinegar from Scratch
Step 1: Harvest Sun Ripened Blackberries
The first thing you need to do is harvest the juiciest blackberries you can find! Ripe fruit contains the highest concentrates of sugar and will create the strongest ferment. Always aim for sun-ripened fruit when making blackberry vinegar!
And in your harvesting, avoid berries that are old and saggy, those that show signs of break down or decay. For this recipe, you’ll need to collect approximately 2 quart (2 litres) of fresh blackberries!
RELATED: Making apple cider vinegar
Step 2: Clean Your Blackberries
After you’ve collected your blackberries, it’s time to head inside and clean them up! Place a colander in your kitchen sink and gently dump the blackberries into it. Give your fruits a quick rinse to remove dust, bugs and spiders.
Step 3: Choose a Juice Extracting Method
In order to create blackberry vinegar, you must first find a way to extract the juice! There are 3 ways to do this with soft fruits. I’m going to give you three viable options and you can decide which one you’d prefer to use!
Method 1: A Raw Extraction
If you wish to keep your berry juice in raw form, this first method is an excellent, low-fuss option! Just follow the steps below!
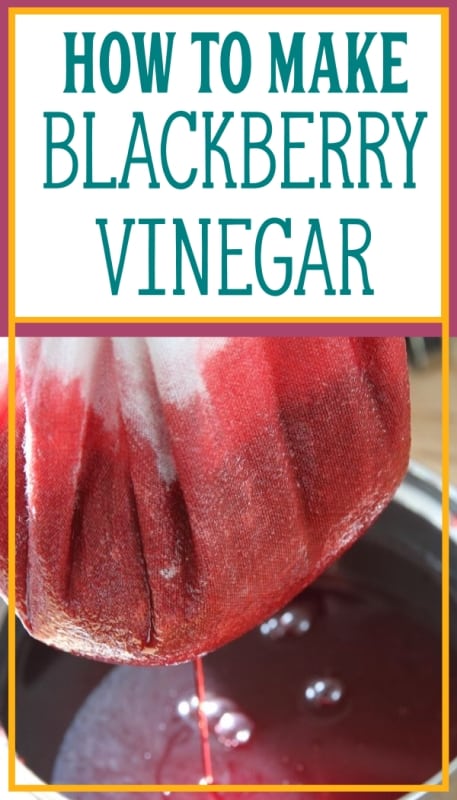
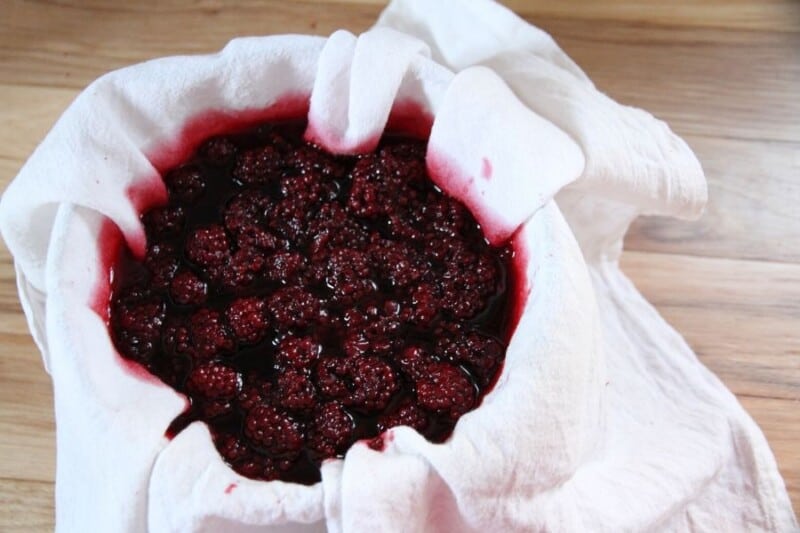
Line a large bowl with a cotton cloth.
Dump your 2 quarts (2 litres) of blackberries into the cloth-lined bowl.
Take an old fashioned potato masher and break the berries up, until they’re a mushy mess.
Gather up each corner of the cloth, knot the ends together and hang where juices will drip into the bowl below.
That’s it! When the dripping stops, you can move on to step 4 in the process (see below).
Method 2: Use a Steam Juicer
If you make homemade jellies or preserve homemade fruit juice, you may own a steam juicer. You can also use this to extract juice from your blackberries! All you have to do is follow the directions in your manual for steam juicing blackberries. Once you’ve collected the juice, it’s ready for fermenting!
RELATED: Uses for Apple cider vinegar
Method 3: A Water Infusion
This method is the one I most commonly use for soft fruits! Here’s how you go about it.
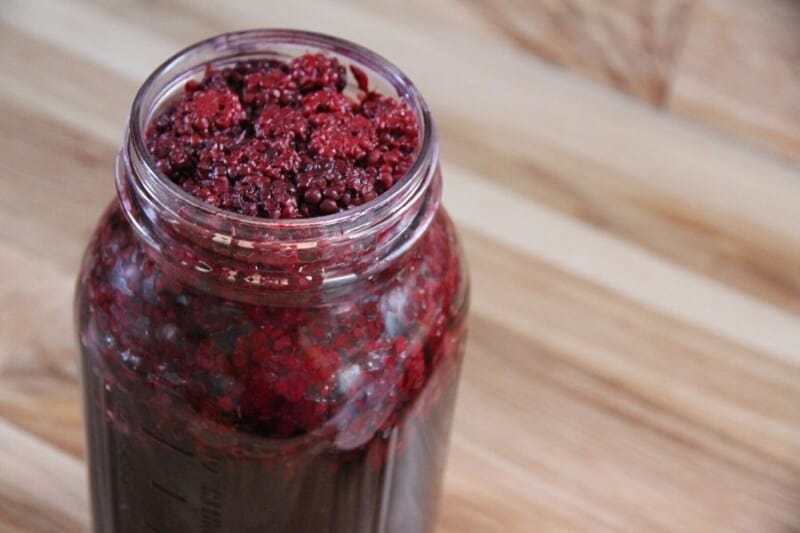
Clean a 2 quart (2 litre) jar and fill it 2/3 full of fresh blackberries.
Add chlorine-free water until your berries are covered by about an inch of water. They will float, so you’ll have to estimate!
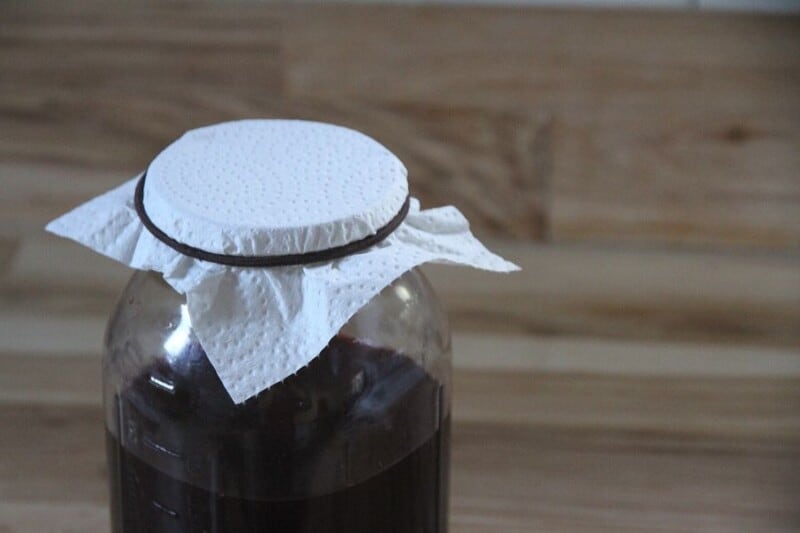
Once water has been added, cover the mouth of the jar to keep fruit flies and dust out. You can use either of the following options:
a cloth, paper towel or coffee filter fastened down by a string or rubber elastic
a canning lid and band (be sure to break the seal daily if fermentation occurs!)
Place the jar on a plate to catch any spillovers that may take place
Shove the filled jar to the back of your kitchen counter and let it infuse for 4-6 days
When the liquid has darkened and blackberries are compacted on the surface of the liquid, line a large bowl with a cotton cloth
Pour the berry infusion into it, then gather up and knot the 4 corners of the cloth
Hang your homemade jelly bag where it can drip into the bowl below
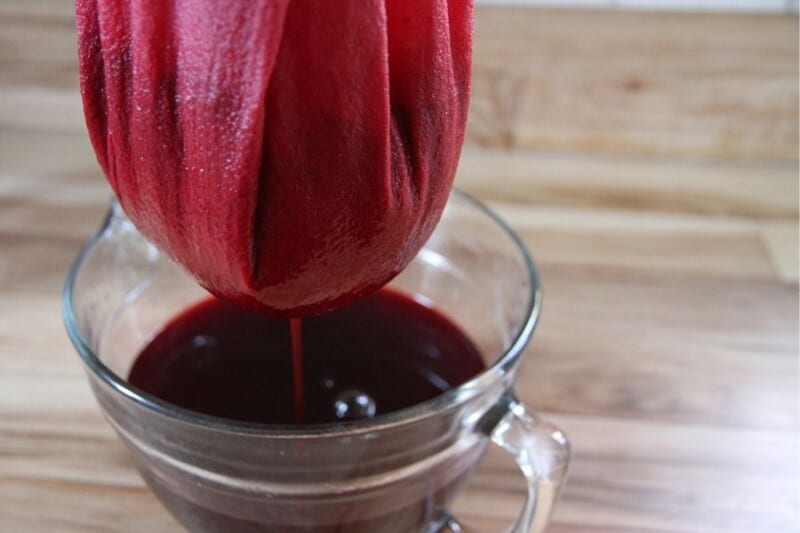
When the dripping stops, you have one of two options! At this point, you can ferment your dark purple berry juice or you can send it through a second batch of berries. A second infusion creates a stronger ferment and in my opinion, a better tasting vinegar!
To create a second infusion, simply repeat the above process with a fresh batch of blackberries. But this time, use your infused liquid (instead of fresh water). After you’ve strained the solids out a second time, the blackberry juice is ready for fermenting!

Step 4: Ferment in Food-Grade Container
When choosing a container for fermenting your berry juice, be sure to use a food-safe option! Vinegar is an acidic substance and has been known to leach unwanted properties from containers that aren’t food-grade. I recommend using a small, stoneware crock or a glass jar with a wide mouth.
To set up for the fermenting process, simply pour the blackberry juice into a food-grade container, then cover the mouth not with a lid, but with a breathable cover. Be sure to fasten it down so fruit flies can’t get in!
A breathable cover is 100% necessary at this point! Your berry juice needs to be able to release carbon dioxide and receive natural yeast and bacteria via air flow. At this point, a lid will only hamper the fermentation process.
Step 5: Ferment Under Proper Temperatures
Once it’s been poured into a food grade container and the mouth is covered, your fruit juice needs to be kept in place that falls in the 60-80 F (16-26 C) temperature range.
You see, natural yeast and bacteria responsible for the fermenting process need semi-warm temperatures to thrive and do their job. If things are too cool, they won’t go into action. And if things are too warm, an unwanted group of organisms will take over and spoil your fruit juice!
The proper temperature range is crucial for success!
Step 6: The Fermenting Phases
There are two fermenting phases in the vinegar making process. The first one is referred to as “the alcohol phase.”
The Alcohol Phase
As your blackberry juice sits, airflow will carry natural yeasts to the surface of your liquid. These yeasts consume the sugars found within your fruit juice and over the course of several weeks, will convert the natural sugars to alcohol.
During this time, you may notice tiny bubbles on the sides of your container. They’ll also appear on the surface of your liquid, and a very slight, alcohol-like aroma will come wafting up from your jar! At this time, you may also notice something like this forming on the surface of your liquid.
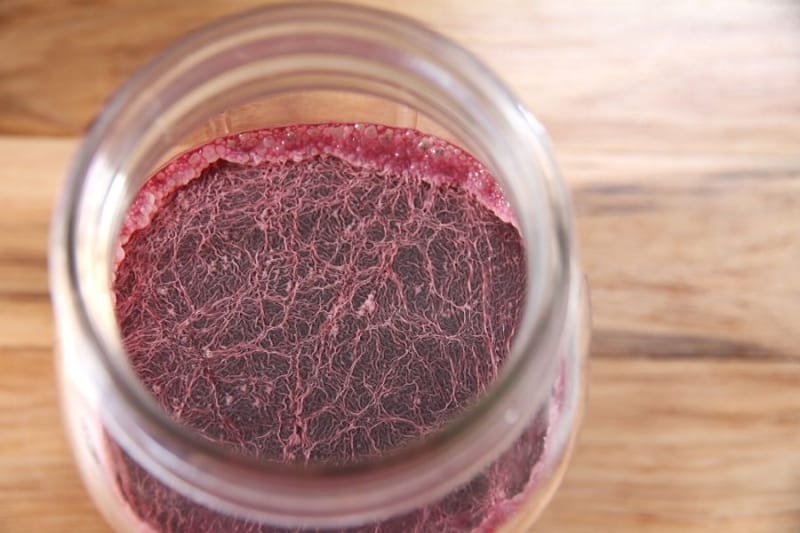
Not to worry! If it makes you uncomfortable, you can skim it off with a spoon. But unless it begins growing mold, this “bloom” won’t hurt anything!
The first phase will take anywhere from 4-6 weeks, after this, your juice will begin transitioning to the second phase.
The Acetic Acid Phase
When natural yeasts have consumed most of the sugars, airflow carries a group of bacteria to the surface of your liquid. This bacteria will slowly transform the alcohol to acetic acid!
In this time, you’ll notice a pungent, nose-tingling aroma floating up from the mouth of your jar. It’s a sure sign that things are going according to plan!
The second phase usually takes 3-6x as long as the first. But when it’s done, you’ll have a delicious, blackberry vinegar ready for use!
Step 7: Testing Your Blackberry Vinegar
There’s one last step in the process that you need to be aware of! Before you transfer your blackberry vinegar to a pretty bottle, jug or jar, you need to make sure it has truly finished fermenting.
Be sure to run this simple test before you seal it up!
Take the food-grade container you will be storing your vinegar in and add several inches of fresh vinegar to it. Seal with a lid or cork. Let it sit on the back of your kitchen counter for several days. Break the seal.
If there was a release of carbon dioxide, it’s not ready yet ready! Return the juice to your fermenting container and let it sit for another 2 weeks.
Run the test again. When there is no pressure release, you know it’s safe to bottle up your homemade blackberry vinegar!
Step 8: Storing Your Blackberry Vinegar
Berry vinegar is shelf stable. There’s no need to refrigerate or preserve it! You can keep it in your kitchen cupboard, on a shelf in the pantry or in a cold room or root cellar.
The only bit of advice I would give you is this: don’t use tin/metal lids for your containers! Vinegar is acidic and will break them down over time.
Personally, I love storing mine in old glass bottle or jugs, stopping them up with corks. They’re prettier to look at that way and I feel like a true, traditional housewife every time I pull them out!
In Conclusion
Learning how to make blackberry vinegar from scratch is simple! And it’s tasty too!
If you want recipes, troubleshooting tips and ideas for using fruit vinegar in the home, be sure to check out my e-book “How to Create and Use Traditional Fruit Vinegar.” With over 5 years of experience stuffed into 60 pages of information, it’s a tool every vinegar brewer should have!
About Autumn Keim
 Autumn Rose is a full time homemaker, gardener, real food cook and avid food preserver. She and her husband live on a tiny farmstead in the mountains of southern BC, Canada. There they have created a healthier life to help manage Autumn’s Lyme disease symptoms. And now one of Autumn’s life goals is to help young women to create healthier homes and families, which she does by teaching traditional life skills. You can find her blog at atraditionallife.com