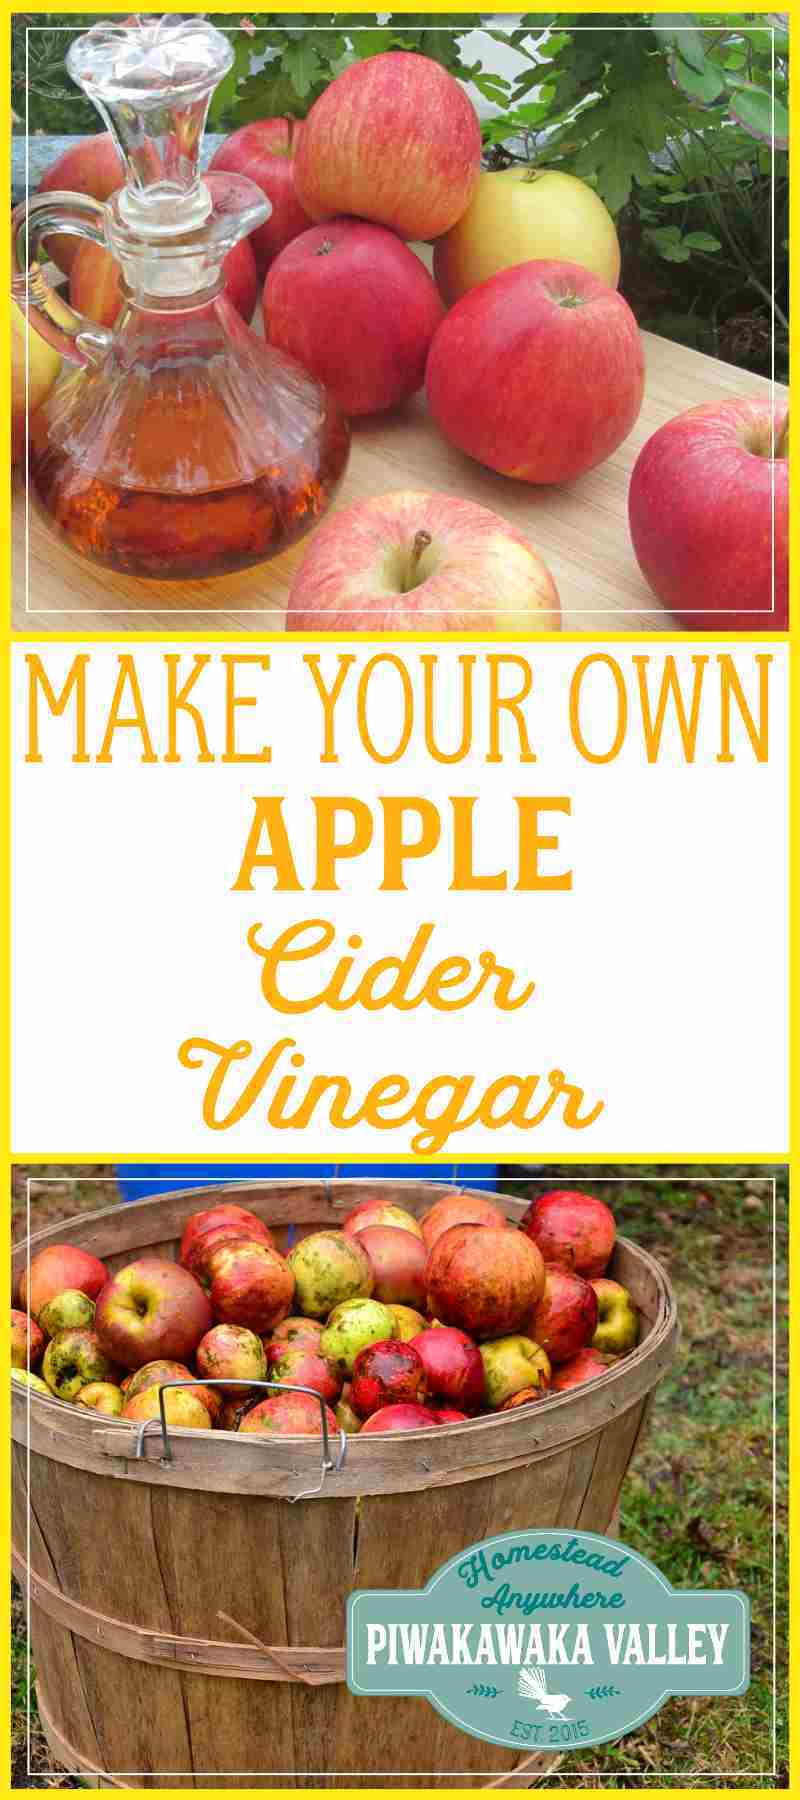

Did you know you can turn apple peels and cores into delicious homemade apple cider vinegar instead of throwing them into the compost?
Making your own apple cider vinegar (ACV) is one of my favourite ways to reduce food waste while creating something genuinely useful. It costs very little, requires only a handful of ingredients, and because it’s made at home, it remains raw, unfiltered and full of the beneficial “mother”.
Whether you’re trying to become more self-sufficient, reduce waste in the kitchen, or simply enjoy making things from scratch, homemade apple cider vinegar is an easy project that’s perfect for beginners.
In this guide, I’ll show you exactly how to make apple cider vinegar from apple scraps, explain why each step matters, help you avoid common mistakes, and answer the questions most people have when making their first batch.
Please read: This information is provided for educational purposes only and is not intended to treat, diagnose or prevent any disease. We encourage you to make your own health care decisions in partnership with a qualified health care professional.
This post contains affiliate links, this means at no extra cost to you, we make a commission from sales. Please read our Disclosure Statement
Quick Answer
To make apple cider vinegar from scraps, place clean apple peels and cores into a sterilised glass jar, cover with sugar water, keep the fruit submerged beneath the liquid, cover the jar with breathable cloth, and allow it to ferment in a warm place. After 2–3 weeks strain out the apples and continue fermenting the liquid for another 6–12 weeks until it smells and tastes like vinegar. During fermentation a cloudy layer called the mother may develop naturally.
📚 Table of Contents
- Why Make Your Own Apple Cider Vinegar?
- What is “The Mother”?
- Benefits of Homemade Apple Cider Vinegar
- Ingredients & Equipment
- Before You Begin
- Step-by-Step Instructions
- Understanding Fermentation
- Common Problems & Solutions
- How to Store Apple Cider Vinegar
- Ways to Use Homemade Apple Cider Vinegar
- Frequently Asked Questions
Why Make Your Own Apple Cider Vinegar?
There are plenty of good apple cider vinegars available to buy, but making your own has several advantages.
First, it’s an excellent way to use something that would otherwise be thrown away.
Every time you peel apples for pies, crumbles, applesauce or preserving, you’re left with a pile of peels and cores. Instead of heading to the compost, those scraps can become a bottle of beautiful homemade vinegar.
Secondly, homemade apple cider vinegar is incredibly inexpensive.
A premium bottle of raw apple cider vinegar with the mother can be surprisingly costly, particularly if you use it regularly for cooking, cleaning or fermentation.
By making your own, the main ingredients are simply:
- apple scraps
- water
- a little sugar
- time.
Finally, there’s something deeply satisfying about making everyday pantry staples yourself.
Just like baking bread, growing vegetables or making yoghurt, homemade apple cider vinegar connects us with traditional kitchen skills that have been used for centuries.
It’s one more small step towards a more self-sufficient home.
What is “The Mother”?
If you’ve ever looked at a bottle of raw apple cider vinegar, you may have noticed cloudy strands or jelly-like blobs floating inside.
Don’t worry…
They’re supposed to be there!
That cloudy material is known as “the mother”.
The mother is a living culture of beneficial bacteria and yeast that naturally develops during fermentation. It’s responsible for converting alcohol into acetic acid, which gives vinegar its distinctive tangy flavour.
Commercial vinegars are often filtered and pasteurised to create a crystal-clear product with a long shelf life.
Unfortunately, that process also removes the mother.
Homemade apple cider vinegar remains raw and unfiltered, allowing the mother to continue developing naturally.
Every batch is slightly different.
Sometimes you’ll grow a thick, impressive mother.
Other times it may only form a few wispy strands.
Both are perfectly normal.
Benefits of Homemade Apple Cider Vinegar
Apple cider vinegar has been used for centuries in kitchens around the world.
Today it’s popular for everything from salad dressings and pickling to natural cleaning and fermentation.
Many people also enjoy drinking a small amount diluted in water, although research into many of the claimed health benefits is still ongoing.
One thing that’s certain is that homemade apple cider vinegar is incredibly versatile.
Some of our favourite uses include:
- salad dressings
- marinades
- pickling vegetables
- homemade chutneys
- cleaning around the home
- fermentation recipes
- adding brightness to soups and sauces.
If you’re looking for more ideas, we’ve put together a collection of 23 practical uses for apple cider vinegar.
Why This Recipe Uses Sugar
This is probably the question people ask me most.
“If apple cider vinegar is supposed to be healthy, why are we adding sugar?”
The answer is simple.
The sugar isn’t there to sweeten the vinegar.
It’s food for the naturally occurring yeasts.
During fermentation, yeast consumes the sugar and converts it into alcohol. Beneficial bacteria then convert that alcohol into acetic acid, creating vinegar.
By the time your apple cider vinegar is finished, very little of the original sugar remains.
You can use honey if you prefer, but I’ve found ordinary white sugar gives the most reliable results and usually ferments more quickly.
Ingredients & Equipment
Ingredients
- Scraps from 6–8 apples (peels and cores)
- 2 tablespoons white sugar per litre (quart) of water
- Filtered or chlorine-free water
- Optional: a splash of raw apple cider vinegar with the mother to help kick-start fermentation
Equipment
- Large glass jar
- Cloth or coffee filter
- Rubber band or string
- Fermentation weight or small glass jar
- Fine mesh strainer
- Clean glass bottles for storing the finished vinegar
Before You Begin
Apple cider vinegar is wonderfully forgiving, but there are a few simple things that will dramatically improve your chances of success.
Most failed batches come down to one of three things:
- Poor hygiene.
- Apple scraps floating above the liquid.
- Not allowing enough time for fermentation.
Fortunately, all three are easy to avoid.
Start With Clean Equipment
Your apples naturally carry the wild yeasts and bacteria needed to make vinegar, so you don’t need to add a commercial starter culture.
What you don’t want is unwanted bacteria from dirty jars or utensils.
Wash everything thoroughly in hot, soapy water and rinse well before you begin.
You don’t need laboratory-level sterilisation, but clean equipment gives the beneficial microbes the best chance to thrive.
Choose Good Apples
The quality of your vinegar starts with the quality of your apples.
Use fresh, healthy apples that are free from mould and rot.
Bruises are perfectly fine.
Small blemishes are fine too.
Just avoid fruit that’s already decomposing.
The wonderful thing about this recipe is that you’re using scraps that would otherwise be discarded.
Peels and cores contain plenty of flavour, natural yeasts and nutrients needed for fermentation.
Which Apples Make the Best Apple Cider Vinegar?
Almost any apple variety will work.
Different apples simply produce slightly different flavours.
- Sweet apples make a milder vinegar.
- Tart apples produce a sharper flavour.
- Mixed varieties often create the most balanced vinegar.
- Crab apples can also be used if you have an abundant tree.
The finished colour also varies depending on the skins.
Red apples often produce beautiful pink or amber vinegar, while green apples generally create a lighter golden colour.
Can I Use Windfall Apples?
Absolutely.
Windfall apples are perfect provided they’re still in good condition.
Simply wash them well, cut away any damaged areas and use the healthy portions.
This makes homemade apple cider vinegar an excellent way to use an abundant autumn harvest that might otherwise go to waste.
How to Make Apple Cider Vinegar from Scraps
Step 1 – Prepare Your Apples
Peel and core around six to eight apples for every one-litre (quart) jar.
The delicious apple flesh can be eaten fresh or turned into pies, apple crumble, apple sauce, dehydrated apples or preserved for later.
All you need for this recipe are the scraps.

I absolutely love my apple peeler/corer. It turns a big pile of apples into vinegar scraps in just a few minutes.
Step 2 – Fill Your Jar
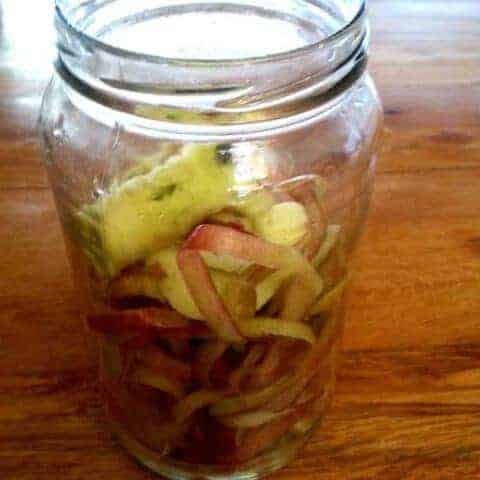
Add all of the peels and cores to a clean glass jar.
Don’t pack them in tightly.
Leave a little room for the water to circulate around the fruit.
For every litre (quart) of water you’ll be using, dissolve in:
2 tablespoons of white sugar.
Pour the sugar water over the apple scraps until everything is completely covered.
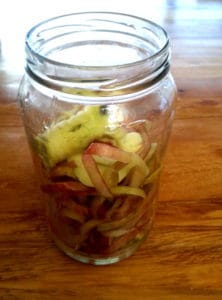
I actually started with a 1 litre jar before realising I’d peeled far more apples than expected. Out came one of my trusty 3 litre preserving jars!
Step 3 – Keep Everything Under the Water
This is one of the most important parts of the whole recipe.
Any apple scraps sticking out above the liquid can quickly grow mould.
Keeping everything submerged dramatically reduces the risk of spoilage.
You can use:
-
- a glass fermentation weight
-
- a small glass jar filled with water
-
- a clean ceramic ramekin
Don’t worry if the apples float at first.
Within a few days they’ll usually soften and begin sinking naturally.
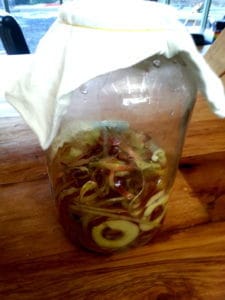
Keeping the scraps completely submerged is one of the easiest ways to prevent mould.
Step 4 – Cover Your Jar
Although your vinegar needs air, it definitely doesn’t need fruit flies.
Cover the jar with:
-
-
-
- cheesecloth
-
-
-
-
-
- a coffee filter
-
-
-
-
-
- or a clean tea towel.
-
-
Secure it with a rubber band or string.
A solid lid isn’t suitable because the fermentation process naturally produces gases that need to escape.
Step 5 – Leave It Somewhere Warm
Store your jar somewhere:
-
-
-
- out of direct sunlight
-
-
-
-
-
- between about 18–25°C
-
-
-
-
-
- where it won’t be disturbed.
-
-
Over the next couple of weeks you’ll notice bubbles forming as the naturally occurring yeasts begin converting sugar into alcohol.
This stage is technically making apple cider before it eventually becomes vinegar.
If you already have a bottle of raw apple cider vinegar with the mother, adding a small splash can help kick-start fermentation, although it’s certainly not essential.
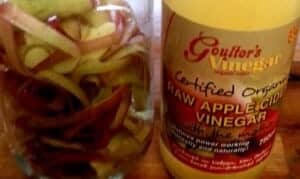
I happened to have some raw apple cider vinegar in the pantry, so I added a splash to give this batch a head start. It isn’t required, but it can speed things up a little.
Understanding the Fermentation Process
If you’ve never made vinegar before, it can seem a little like magic.
You put apple scraps into sugar water…
Leave them sitting in the cupboard…
Come back a few weeks later…
And somehow you’ve made vinegar!
In reality, two different fermentation processes are taking place.
Stage One – Sugar Becomes Alcohol
During the first couple of weeks, naturally occurring wild yeasts found on the apple skins begin feeding on the sugar.
As they consume the sugar they produce:
-
-
-
-
-
-
-
- Alcohol
-
-
-
-
-
-
-
-
-
-
-
-
-
- carbon dioxide (the bubbles)
-
-
-
-
-
-
-
-
-
-
-
-
-
- lots of delicious fruity aromas.
-
-
-
-
-
-
This is why your jar often smells more like apple cider than vinegar during the early stages.
That’s exactly what you want.
Stage Two – Alcohol Becomes Vinegar
Once enough alcohol has developed, a different group of naturally occurring bacteria takes over.
These bacteria convert the alcohol into acetic acid.
Acetic acid is what gives vinegar its unmistakable sharp, tangy flavour.
As this process continues, the alcohol smell gradually disappears and is replaced by the familiar aroma of vinegar.
This second stage takes patience.
Most batches need another 6–12 weeks, although cooler temperatures can slow things down.
Good vinegar can’t be rushed.
↑ Back to top
How to Know When It’s Ready
The easiest way to tell if your apple cider vinegar is finished is to trust your senses.
It should:
-
-
-
-
-
-
-
- smell pleasantly vinegary
-
-
-
-
-
-
-
-
-
-
-
-
-
- no longer smell alcoholic
-
-
-
-
-
-
-
-
-
-
-
-
-
- taste tart and acidic
-
-
-
-
-
-
-
-
-
-
-
-
-
- look clear or slightly cloudy
-
-
-
-
-
-
-
-
-
-
-
-
-
- possibly contain a mother floating inside.
-
-
-
-
-
-
If it still smells strongly of alcohol, simply give it another couple of weeks.
Fermentation isn’t an exact science.
Temperature, apple variety and the naturally occurring yeasts all influence how quickly your vinegar matures.
Should I Stir My Vinegar?
During the first stage of fermentation it’s perfectly fine to gently stir the mixture every day or two.
This helps:
-
-
-
-
-
-
-
- keep the apple scraps wet
-
-
-
-
-
-
-
-
-
-
-
-
-
- discourage mould forming on exposed fruit
-
-
-
-
-
-
-
-
-
-
-
-
-
- encourage even fermentation.
-
-
-
-
-
-
Once you’ve strained out the apples and the vinegar is quietly maturing, it’s generally best to leave it alone.
The mother often develops on the surface during this stage.
↑ Back to top
Common Problems and Solutions
The first time you make apple cider vinegar, it’s completely normal to wonder if everything is going according to plan.
Fortunately, most “problems” turn out to be perfectly normal.
White Film on Top
Usually: Kahm yeast.
Kahm yeast is a harmless wild yeast that sometimes develops during fermentation.
It often appears as a thin white film that may look powder, wrinkled, white, slightly opaque or like tissue paper floating on the surface.
Although it isn’t harmful, kahm yeast can affect the flavour if left for too long. Simply skim it off with a clean spoon and continue fermenting.
Is It Mould?
Mould is very different from kahm yeast.
If you see anything that is green, blue, black, grey or pink it’s safest to discard the batch and begin again.
Mould usually develops because apple scraps have been exposed above the liquid. Keeping everything submerged is the easiest way to prevent it.
It Smells Like Alcohol
Perfect.
That’s exactly what should happen during the first stage.
Remember:
Apple → Alcohol → Vinegar
The alcohol stage comes before the vinegar stage.
It Doesn’t Smell Like Anything
Fermentation may simply be moving slowly.
Check:
-
-
-
-
-
-
-
- your room temperature
- that enough sugar was added
- your apples weren’t treated with preservatives
- that the jar can breathe.
-
-
-
-
-
-
If it’s winter, fermentation often takes significantly longer.
Fruit Flies Have Invaded!
Fruit flies absolutely adore fermenting fruit.
Always cover your jar with breathable fabric that’s secured tightly with a rubber band.
Even the tiniest gap is an open invitation.
Why Isn’t My Vinegar Sour Yet?
Because it probably isn’t vinegar yet.
Many beginners bottle their batch too early.
Don’t watch the calendar.
Watch the vinegar.
When the alcohol smell disappears and the flavour becomes pleasantly acidic, it’s ready.
↑ Back to top
Step 6 – Strain the Apples
After around two to three weeks, strain out all of the apple scraps.
At this stage the liquid will often smell slightly alcoholic.
That’s completely normal.
The vinegar bacteria still have work to do.
Discard the spent apple scraps into the compost—they’ve done their job.
Step 7 – Continue Fermenting
Pour the strained liquid back into your clean glass jar.
Recover it with your breathable cloth.
Now simply leave it somewhere warm for another six to twelve weeks.
This slower second fermentation is where the real transformation happens.
Over time you’ll often notice the mother beginning to develop.
Sometimes it floats.
Sometimes it sinks.
Both are perfectly normal.
Step 8 – Bottle Your Vinegar
Once your vinegar tastes pleasantly tart and no longer smells alcoholic, it’s ready to bottle.
Simply strain out any large pieces of sediment if you wish, then pour it into clean glass bottles.
Don’t worry if some cloudy material remains.
That’s part of what makes raw apple cider vinegar special.
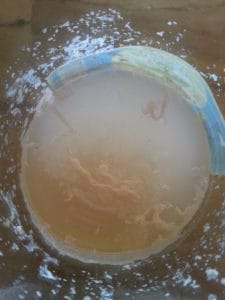
The finished colour depends almost entirely on the apple varieties you use. My red apples produced this beautiful rosy vinegar.
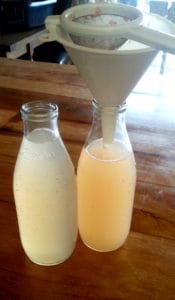
Notice the slight colour difference? The bottle on the right came from the bottom of the jar and contains more of the natural sediment and mother. Next time I’d probably give everything a gentle stir before bottling!
How to Store Homemade Apple Cider Vinegar
Once your apple cider vinegar has reached the flavour you like, simply pour it into clean glass bottles.
You can strain out the larger pieces of sediment if you prefer, but there’s no need to filter it until it’s perfectly clear.
In fact, many people intentionally leave the mother in the bottle because it can continue developing over time.
The Best Containers
Glass is by far the best choice for storing homemade vinegar.
Suitable options include Glass preserving jars, Recycled vinegar bottles, Swing-top glass bottles and Mason jars.
Because vinegar is acidic, avoid storing it long-term in metal containers, as the acid can react with certain metals over time.
Does Homemade Apple Cider Vinegar Need Refrigerating?
No.
Apple cider vinegar has a naturally low pH, making it self-preserving.
Simply keep it in a cool dry dark place.
Your pantry is usually perfect.
How Long Does Homemade Apple Cider Vinegar Last?
A very long time.
Properly made apple cider vinegar can last for years.
Over time you may notice more sediment forming and a thicker mother. There might be slight colour changes as well, these are all completely natural.
As long as your vinegar smells pleasantly acidic and hasn’t developed mould, it’s generally perfectly usable.
↑ Back to top
Can You Reuse the Mother?
Yes—and many people do.
The mother contains living acetic acid bacteria that can help jump-start future batches.
Simply add a small piece of the mother or a splash of your finished raw apple cider vinegar to your next batch.
While it isn’t essential, it can shorten the fermentation time and gives the beneficial bacteria a head start.
Think of it a little like using sourdough starter or kombucha SCOBY.
Ways to Use Homemade Apple Cider Vinegar
One of the best things about making your own apple cider vinegar is how quickly you’ll find yourself reaching for it.
We use ours throughout the year in both the kitchen and around the home.
In the Kitchen
- Salad dressings.
- Homemade mayonnaise.
- Marinades.
- Pickled vegetables.
- Chutneys.
- Relishes.
- Sauces.
- Deglazing frying pans.
Around the Home
- Natural household cleaning.
- Removing mineral deposits.
- Cleaning glass.
- Laundry rinse.
- General-purpose cleaner (when diluted).
For Fermentation
- Quick pickles.
- Vegetable ferments.
- Fermentation starter.
- Making shrub drinks.
Looking for even more ideas?
Have a look at our complete guide to 23 Uses for Apple Cider Vinegar.
↑ Back to top
Frequently Asked Questions
Can I make apple cider vinegar from just peels?
Yes. Peels work perfectly well. Adding the cores simply gives you more apple material and slightly more flavour.
Can I use whole apples?
Absolutely. Using scraps is simply a fantastic way to reduce waste.
Can I use organic apples?
Yes, and they’re often preferred because the skins usually carry more natural wild yeasts and haven’t been coated with post-harvest treatments.
Can I use supermarket apples?
Yes. They work very well.
Why do I need sugar?
The sugar feeds the yeasts that begin fermentation. Most of it is consumed during the process.
Can I use honey instead?
You can, but fermentation is generally slower and sometimes less predictable.
How long does it take?
Most batches take between 8 and 12 weeks, although temperature can make a big difference.
Can I speed it up?
Adding a splash of raw apple cider vinegar with the mother can help introduce beneficial bacteria more quickly.
What if I forget about it?
You’re in good company! Homemade vinegar is surprisingly forgiving. Many forgotten jars have turned into perfectly good vinegar after a few extra months.
My vinegar has a jelly-like blob. Is that okay?
Yes. That’s usually the mother forming naturally.
Why is my vinegar cloudy?
Cloudiness is perfectly normal in raw, unfiltered apple cider vinegar.
Can children help make this?
Definitely. It’s a fun way to teach children about food waste, fermentation and traditional kitchen skills. Adult supervision is recommended when handling knives and glass jars.
Can I double the recipe?
Absolutely. Just keep the sugar-to-water ratio the same.
Does homemade vinegar taste different?
Usually yes. Every batch develops its own unique flavour depending on the apple varieties used and the natural microbes involved in fermentation.
Can I make vinegar from pears?
Yes! The same basic process works with many different fruits including pears, peaches and other fruit scraps.
↑ Back to top
Tips for Success
If there’s one thing I’ve learnt from making homemade apple cider vinegar over the years, it’s this:
Don’t overthink it.
Fermentation has been happening naturally for thousands of years.
Long before anyone understood yeast or bacteria, people were successfully making vinegar in kitchens and farmhouses all over the world.
Keep your equipment clean.
Use fresh apple scraps.
Keep everything submerged.
Be patient.
Nature does the rest.
🍎 From Our Kitchen
One of my favourite things about this recipe is that it turns what used to be kitchen waste into something genuinely useful. Every autumn, whenever we’re peeling apples for pies, preserving or dehydrating, someone in the family inevitably asks, “Are you making vinegar again?” It has become one of those simple seasonal traditions that reminds me just how satisfying homemade food can be.
↑ Back to top
Final Thoughts
Making apple cider vinegar from scraps is one of the simplest fermentation projects you can try.
It doesn’t require expensive equipment, specialist ingredients or years of experience.
Instead, it rewards a little patience with a delicious, versatile pantry staple that can be used in cooking, preserving, cleaning and countless other ways.
Perhaps the best part is knowing that you’ve turned something that would normally be thrown away into something genuinely valuable.
Whether you’re trying to reduce food waste, become more self-sufficient or simply enjoy learning traditional kitchen skills, homemade apple cider vinegar is a wonderfully rewarding project.
I’d love to hear how your batch turns out! If you make this recipe, leave a comment below and let us know how it went—or share any tips you’ve discovered along the way.
Happy fermenting!
↑ Back to top
Related Articles
How to Make Apple Cider Vinegar with the Mother from Scraps
How to make apple cider vinegar from scraps
Ingredients
- Apples
- A big glass jar
- A cloth
- Water
- Sugar
- Time
- A dark warmish cupboard
Instructions
Making Apple Cider Vinegar Instructions
1. Prep your apples
Peel and core your apples - you need 6-8 apples for a 1 litre/1 Quart jar.
2. Eat your apples
Make something delicious with the yummy bits of the apples.
3. Load up your ACV jar
Put your peels and cores in your jar. Add 2 Tablespoons of sugar for each quart/litre.
I started with a 1L jar but I had lots of bits, so I switched to once of my 3L jars
4. Cover the scraps with water
To keep them submerged place a small jar full of water on top of the apple peels as a weight. You want just enough water to fully cover your apples.
Just enough water that everything is submerged, it might float at first, but it will sink with time.
5. Cover and secure
Cover the jar loosely with a cloth, securing it with a rubber band or piece of string. This allows your ACV to breathe while keeping the pesky fruit flies out.
6. Store to ferment
Sit your jar somewhere at room temperature for 2-3 weeks. If you add a splash of raw apple cider vinegar it speeds up the process and you will only need to leave it for 1-2 weeks.
This is the raw ACV I found at the supermarket. I added a little splash because I had some on hand, but you don't need to!
7. Strain
After a couple of weeks, strain out the apple pieces. At this stage, it should smell alcoholic - hence the cider bit in the name. Vinegar is alcohol that is then metabolized by bacteria and converted into vinegar.
8. Re-cover and rest again
Re-cover with the cloth top and pop back into your darkened cupboard for further 6-12 weeks. It is ready once it tastes like vinegar and the alcohol smell has gone.
9. Bottle
It should have some floaties in the mix by now, this is the SCOBY (Symbiotic colony of bacteria and yeast)/mother. Simply strain out the chunky bits and store and a clean glass bottle. It is now ready to use however you wish!
Please Pin & Share