This post was most recently updated on August 31st, 2021
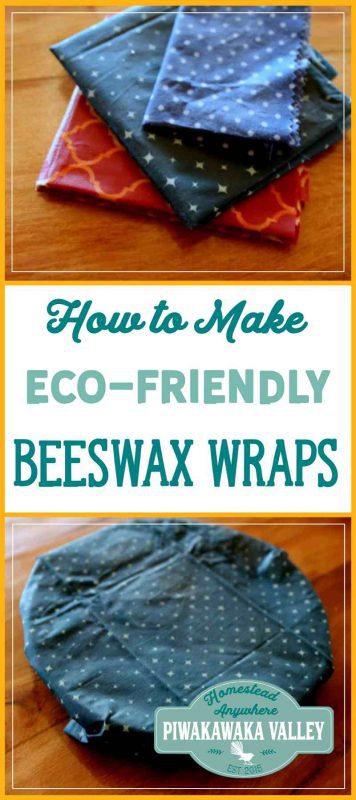
These DIY beeswax wraps are not the most basic recipe, however this is the best, longest lasting and most flexible beeswax food wrap recipes. A homemade beeswax wrap make with these step by step instructions will become your go-to reusable food wrap and it will replace both plastic cling wrap and parchment paper for wrapping food in your lunchboxes.
Please read: This information is provided for educational purposes only and is not intended to treat, diagnose or prevent any disease. We encourage you to make your own health care decisions in partnership with a qualified health care professional.
This post contains affiliate links, this means at no extra cost to you, we make a commission from sales. Please read our Disclosure Statement
One of the biggest game changers in our plastic free kitchen adventure was discovering how to make beeswax wraps. Plastic wrap, cling film, gladwrap – whatever you want to call it, it is everywhere. We use it to wrap sandwiches, fruit, snacks, leftovers, take-a-plates, cheese, baking, you name it, we can wrap it.
Unfortunately, once plastic wrap is created, we are stuck it forever. Sea life thinks it is food, other animals choke on it and it probably isn’t good for us to wrap our food in either, let’s be honest.
BUT there is an alternative! food wraps!
These are a , tree rosin and infused cloth, that self-adheres, is reusable and can come in any pattern or size you like. In fact, the beeswax-infused cloth is better for storing food in because it also breathes so your food won’t sweat. No more slimy soggy cheese edges or squishy avocado.
I have made several versions of the wraps before I found a combination of ingredients that worked well, once you learn with this recipe, you will be able to give them as gifts as well.
This wraps recipe contains and , this is the recipe that commercial zero waste wraps are made with. While this method is more complex than the instructions that just have you grating over cloth and cooking it, this method I outline below will give you a far superior result.
What you need to make beeswax wraps?
Beeswax wraps are really simple to make at home, but you will need some specialty products that you might not have lying around the house.
Required to Make your Own Wraps
The first time I made wraps, I used straight on calico cotton. The wasn’t pliable enough on its own and didn’t stick to itself either, it just cracked and the calico cotton was just too thick and heavy.
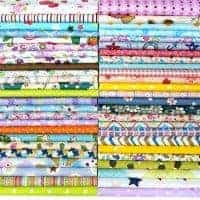
You need a that is thin and flexible, like bed sheets. Light 100% cotton quilting works well and comes in the most fantastic patterns.
How much fabric do you need to make beeswax wraps?
It very much depends how many you want, for a sandwich sized wrap you will need a square about 1 foot or 30cm across. For larger wraps to cover bowls you can make them whatever size your dish requires. The recipe here makes about 6 sandwich wraps.
options for making homemade wraps
These wraps include damar (you can substitute it for pine if you prefer) which adds to the durability of the , and adds the sticky factor to the wraps.
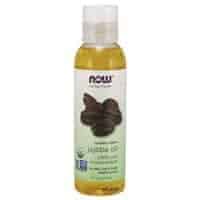
Oil options for making wraps at home
The food wraps also include which is a natural anti-microbial oil and it also adds to the flexibility of the wrap. You can substitute for any liquid, food-safe oil if you prefer, but it won’t have the same anti-microbial effect. is not soft enough to use, but olive oil or canola oil will work well.
RELATED: Make your own 100% soap
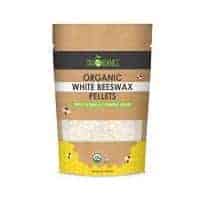
What kind of do you need to make wraps?
is the same product no matter what shape it comes in. Many choose to use () to make this recipe. If you buy your in large pieces you can simply use a box grater and use in the pot. The point of it the smaller the pieces, the faster they will melt.
How much beeswax do you need to make wraps?
This recipe uses 100g or 3.5oz of beeswax to make 6 sandwich sized wraps, you can easily double or triple this to make more, or halve it to make less.
Can you make homemade wraps with just beeswax?
There are many instructions online for simply grating beeswax over cotton fabric and then baking it until it is all melted through the cloth. While this is appealingly simple, the wraps will crack and not stick to themselves leaving you with an inferior result and wasted resources.
Equipment you will need to make wraps at home
is known for its ability to be solid at room temperature, and adhere to things that you melt it on to. This is a blessing when you are trying to waterproof something, but it is a curse when it comes to cleaning up.
You will need a or covered in either aluminum foil or to stop the adhering to your . can be mopped up with the next piece of .
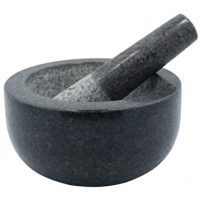
You will also need someway of crushing the resin (unless it is already powdered) and some way of grating your beeswax if it is not already small.
Use an old pot to melt your mixture together in, and an old paintbrush for spread the wax mixture.
Why we use in making Wraps
plays a dual role when making wraps:
- It helps keep the coating soft and supple
- It is a natural antibacterial oil that is also food safe.
You can replace it with any food safe, liquid oil. Common replacements include almond or olive oil.
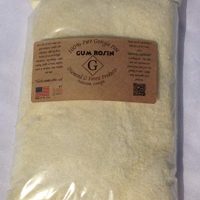
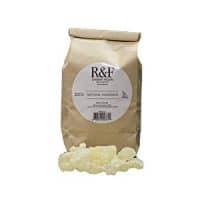
Why we use / Damar or Pine making Wraps
You can use a few different types of tree resin for making beeswax wraps. I prefer to use damar as it is not as strong smelling as pine , it won’t taint your food like pine might.
Is Damar food safe?
Damar has multiple uses – artists use it as a paint base, so you can often find it at art stores. Damar is also used in food glazes and is considered food-safe. Related: Caring for your wraps properly
How to Make Beeswax Wraps at Home that Really Work
How do you make beeswax resin wraps?
YOU NEED:
100g Beeswax (3.5oz) or 6 tablespoons of melted beeswax
20g Damar resin (.7oz) or Pine rosin or 3 tablespoons of finely crushed resin
3 teaspoons (15ml/.5 fluid ounce) Jojoba oil
6 squares of light, woven cotton fabric, pre washed and dried 30x30cm (12x12in).
An old pot, old clean paintbrush (or new cheap one), tinfoil, mortar and pestle or some way of crushing the resin.
If you are in NZ and making your beeswax wraps, try finding beeswax and jojoba oil here and Damar resin here.
METHOD: How to make beeswax wraps with jojoba oil:
Chop up your beeswax into chunks and place in an old pot – beeswax is very flammable, so if you have an open flame, you are best to do this in a double boiler (two pots that fit on top of each other, the bottom one is partly filled with water) or in a crock pot.
This will ensure your beeswax doesn’t catch fire. Crush the resin in a mortar and pestle and add to the wax.
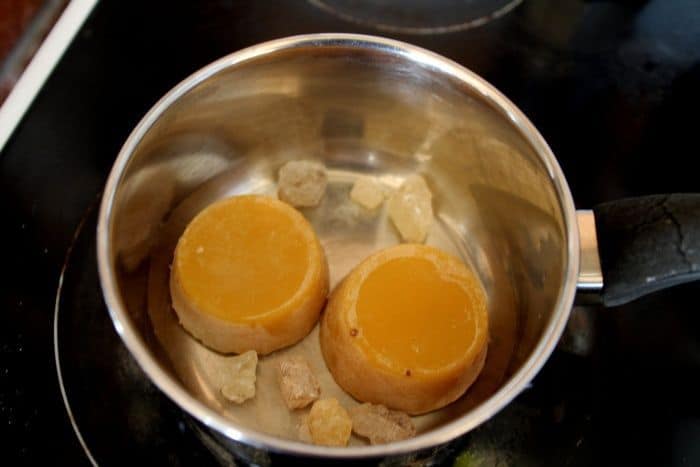
So today I was lazy and didn’t chop or crush, it worked, but it would have been much easier to melt if the pieces were smaller
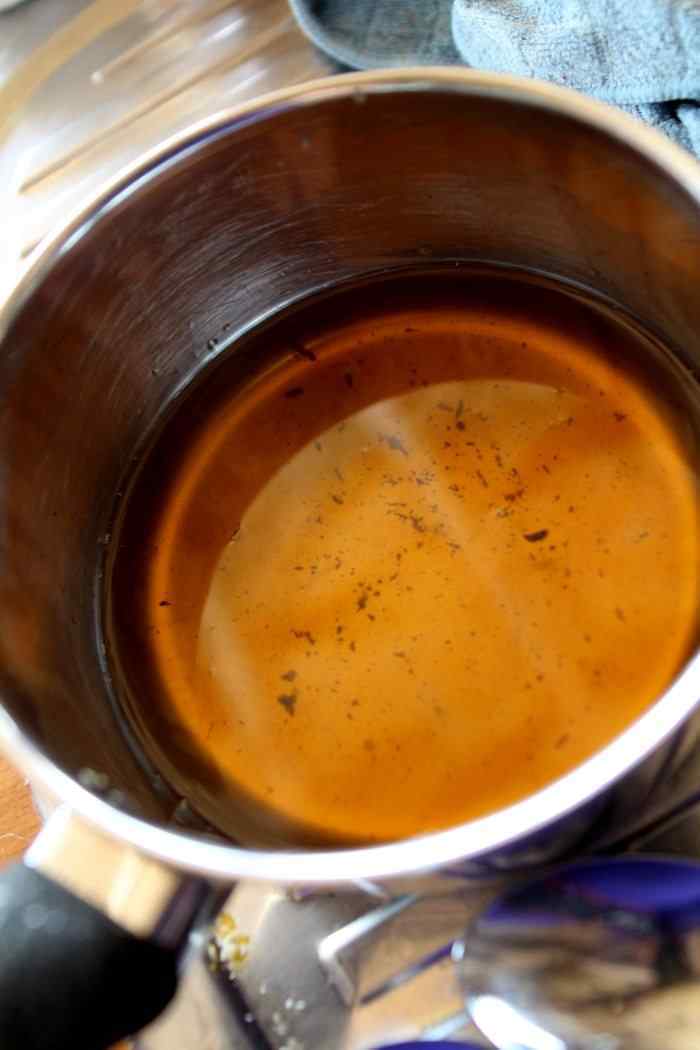
Melt over a medium heat and stir intermittently until all melted together, then remove it from the heat.
Add the jojoba oil and stir well.
Turn your oven on to 100C (200F) to pre-warm, and cover some baking sheets with tin foil to protect them.
Cut your fabric to size. I prefer to use pinking shears to help stop the fraying, but I don’t own any so today it was straight cuts.

It is not a trick, these are bigger than stated, I wanted some large ones for platters for the festive season.
These are ‘fat quarters’ 50x52cm. Line your bench with tinfoil and lay your fabric on top of it.
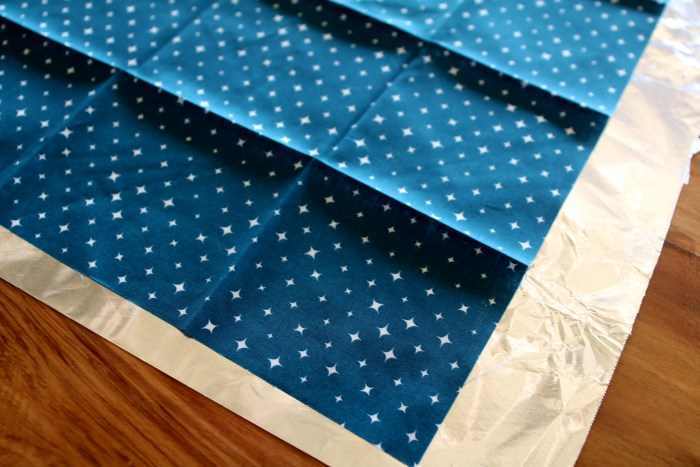
With your old paint brush paint one side of the fabric with the wax mixture.
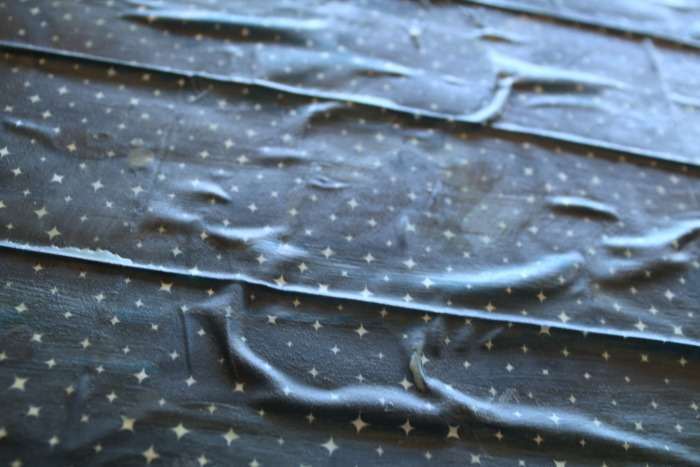
Try and get it even-ish, it cools fairly quickly and heating it in the oven helps even it out. Place the tinfoil and fabric onto a tray and pop in the oven for 5 minutes.
Take it out of the oven and check the wax is now evenly soaked through to the back. If it has not, return it to the oven for 3 more minutes, adding more wax if required.
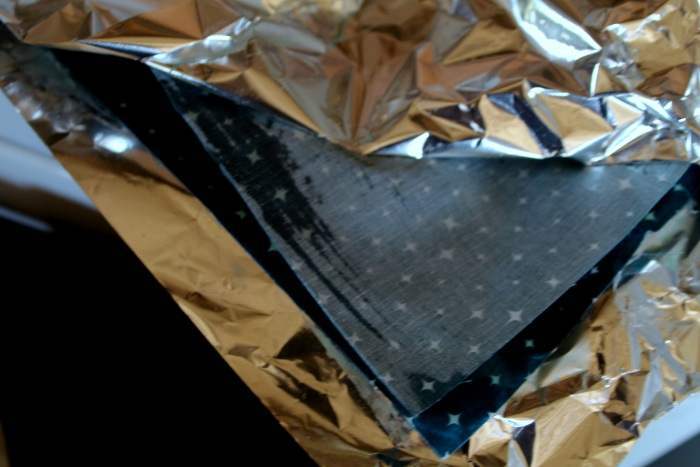
See the image above, the dark patch is where the wax has soaked through, the rest has not yet soaked through.
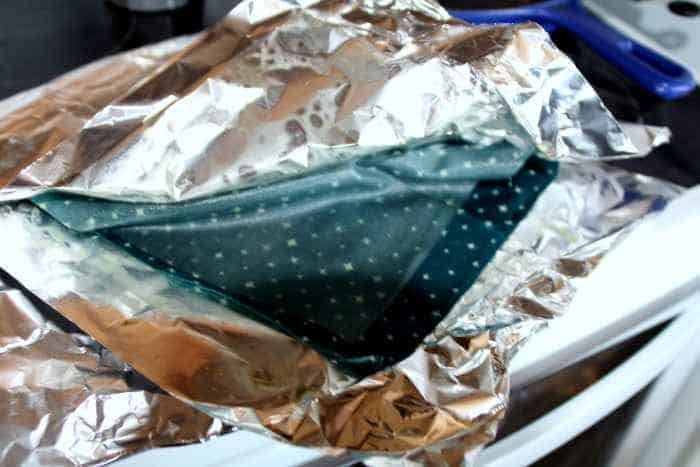
Here you can see it is totally soaked through with the wax.
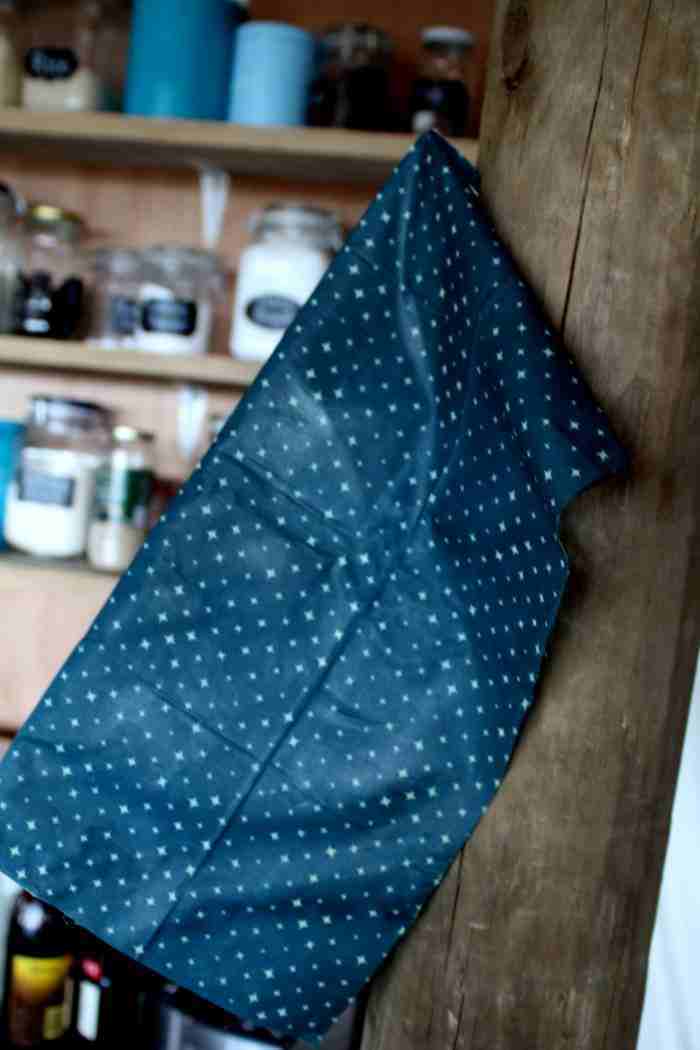
Once the back is evenly coated carefully remove the beeswax wrap from the foil and hang it somewhere for about 3 minutes to set.
I use tongs to pick it up with, though it cools very quickly, sometimes I use my fingers and just wave it in the air a bit to set it.
CLEAN UP TIP – wipe your pot out with paper towels/rags before attempting to wash it.
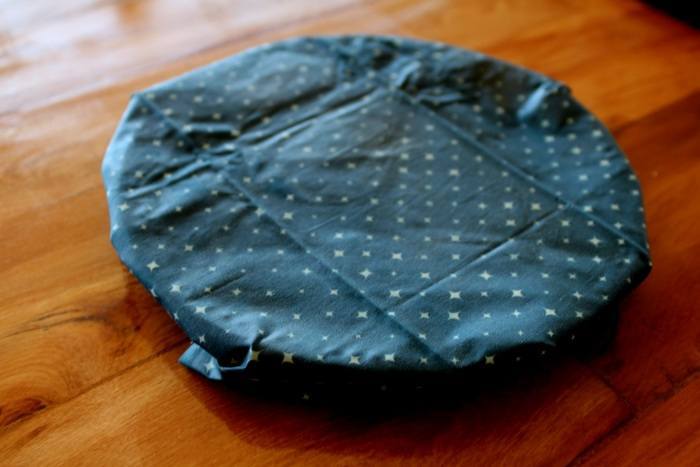
Now it is ready to use, simply place your beeswax wrap over the dish that you want to cover, and use the warmth of your hands to soften the wrap and help the wax to stick to itself.
Do not use your beeswax wrap to wrap meat, the juices can soak in to the cloth and cause bad bacteria to infect it (not to mention the stink!)
Beeswax wraps are perfect to wrap bread, cake, cookies, cheese, nuts and sandwiches. These homemade food wraps are great for school lunches, or to keep your homemade bread fresh, or stop your cheese sweating in the fridge.
After Care for your Beeswax Wrap
Wash in with a . Do not put in the washing machine. This coating should last 6-12 months of regular use.
If you notice it is starting to lose it’s stick, place in a medium on a foil lined tray for 5-8 minutes to re-distribute the . It will eventually need a proper re-coat of the .
For more information on caring for your wraps click here.
How do you make your beeswax wrap sticky again?
After some use, the coating on your beeswax wraps will start to fade. One of the first causes of a loss of stickiness is picking up dust and grime. The first step to making your wraps sticky again would be to give them a good wash in tepid water with mild dish soap, this will remove any dust or grime that has accumulated. Hang the wraps up to dry and check if their stick has returned. If it has not, the next phase is to place them on a foil lined baking sheet and place them in a low oven for 3-5 minutes to allow the coating to re-distribute. If after cooling they are still not sticky, then you have two options, add more mixture, or put your wrap in the compost bin and make new ones.
Why are your beeswax wraps sticky?
One of the appeals of this recipe is that it is somewhat sticky. This allows the fabric to adhere to both itself and any container you are applying it to. But there is such a thing as being too sticky and leaving a residue on your bowls. If this is the issue that you are having, it is probably that you have too much of the wax mixture on your wraps.
It is a fine balance between having enough and having too much on your wraps. If you find that you have too much, all you need to do is place the wraps in a low oven – around 100c/200F for 3-4 minutes or until the wax is liquid again, and then blot off the excess with another piece of cotton fabric, or a paper towel.
If this doesn’t remedy the situation for you, you can add more beeswax and less oil next time that you make the wrap mixture.
ADVANCED LEVEL: Sew little pockets/envelopes and then coat them in the to make little for nuts and raisins etc. All seem like too much work? You can buy these already made here :


Got any questions? What do you use instead of plastic wrap? Let me know in the comments below!
Like this? Please Pin and Share with your friends!
These are a beeswax, tree rosin and oil infused cloth, that self-adheres, is reusable and can come in any pattern or size you like. In fact, the beeswax-infused cloth is better for storing food in because it also breathes so your food won't sweat. No more slimy soggy cheese edges or squishy avocado. I use tongs to pick it up with, though it cools very quickly, sometimes I use my fingers and just wave it in the air a bit to set it. Now it is ready to use, simply place your beeswax wrap over the dish that you want to cover, and use the warmth of your hands to soften the wrap and help the wax to stick to itself. Do not use your beeswax wrap to wrap meat, the juices can soak in to the cloth and cause bad bacteria to infect it (not to mention the stink!) Beeswax wraps are perfect to wrap bread, cake, cookies, cheese, nuts and sandwidges. These homemade food wraps are great for school lunches, or to keep your homemade bread fresh, or stop your cheese sweating in the fridge. As an Amazon Associate and member of other affiliate programs, I earn from qualifying purchases.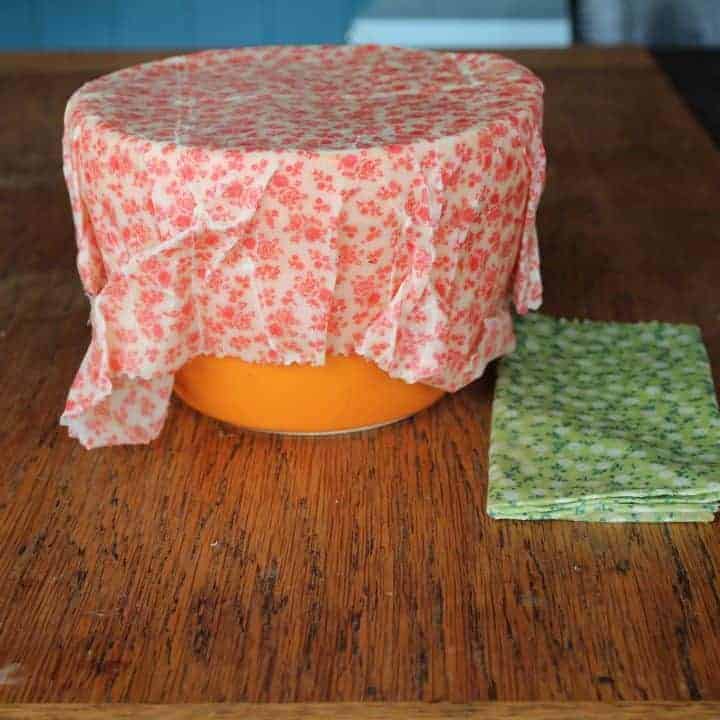
How to Make Beeswax Wraps
Materials
Tools
Instructions
So today I was lazy and didn't chop or crush, it worked, but it would have been much easier to melt if the pieces were smaller
It is not a trick, these are bigger than stated, I wanted some large ones for platters for the festive season. These are 'fat quarters' 50x52cm.
Try and get it even-ish, it cools fairly quickly and heating it in the oven helps even it out.
See here the dark patch is where the wax has soaked through, the rest has not yet soaked through.
Here you can see it is totally soaked through with the wax.CLEAN UP TIP - wipe your pot out with paper towels/rags before attempting to wash it.
Recommended Products