This post was most recently updated on June 13th, 2022
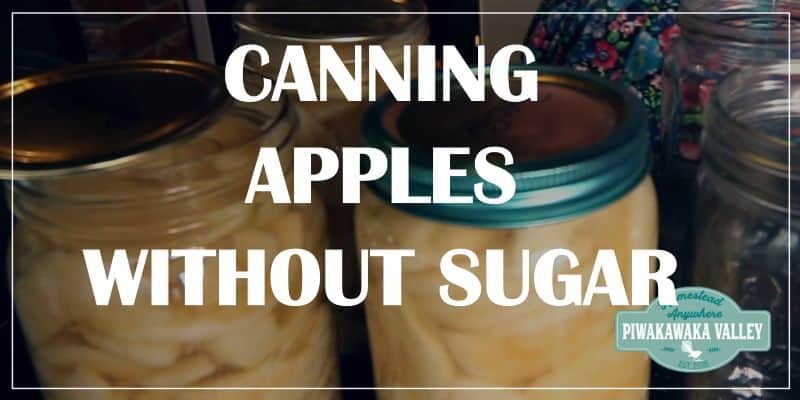
Pressure canning is the only way that you can store fresh vegetables at room temperature without pickling them.
Please read: This information is provided for educational purposes only and is not intended to treat, diagnose or prevent any disease. We encourage you to make your own health care decisions in partnership with a qualified health care professional.
This post contains affiliate links, this means at no extra cost to you, we make a commission from sales. Please read our Disclosure Statement
The water bath method is fine for high acid or high sugar foods, but normal vegetables like beans, carrots, potatoes, corn and asparagus all need to be pressure canned.
What is a Pressure Canner?
A pressure canner is different to a pressure cooker. A pressure canner is taller and designed to go to a higher pressure.
You cannot use a pressure cooker to safely pressure can foods, however you can use a pressure canner to pressure cook your foods.
What Pressure Canner is the best?
This is a big question! There are two main popular brands of pressure canner available.
The All American Pressure Canner Review

![]()
Pros:
It is big and built to last.
You do not have seals that need replacing.
The 21 Quart model holds 7x 1 quart jars
Made from warp resistant aluminium
Cons:
Very expensive
Too heavy for glass-top cookers
Presto Pressure canner review

![]()
Pros:
It is light enough to go on glass cook tops
Made from warp resistant aluminium
Easy to use
Less expensive
The 23 Quart model holds 7 x 1 Quart jars
Cons:
You will eventually have to replace the rubber seal
The 15 psi weight is included, but the 5 and 10-pound weights for the pressure regulator need to be ordered separately – I only use the 15psi one anyway.
I own and love the Presto Pressure canner. I got it from Amazon, but shipping to NZ was a lot. You can get them from Australia here.
For more info on buying a pressure canner in New Zealand, here is the post you need.
Hot pack vs Cold packing Jars
You can choose whether you want to hot pack or cold pack your jars.
If you are hot packing, you need to heat your jars in the oven set at 100C/200F for 10 minutes and carefully remove them and fill them with your hot foods.
Cold packing allows you to add raw vegetables and cold water or brine to cold jars.
The advantage to hotpacking is that many fruits and vegetables shrink and squish when you heat them, so you can fit a lot more of them in to a jar if you make them squishy first.
The advantage to cold packing is that the foods aren’t as mushy when you finish processing them, and it is faster to set up.
I tend to cold pack soups, stews and green beans, and hot pack tomatoes, mushroom slices and anything using minced or ground meat.
I love the Ball canning book recipes and instructions combined with my own canners recipe book.

![]()
How to use a pressure canner to can vegetables
Each brand of pressure canner is slightly different, and you need to read through the manufacturer’s instructions for your canner carefully before using a new pressure canner for the first time.
The instructions that follow apply to pressure canning in general to make it easier to see how they work.
1. Place Rack into the Canner & Add some Water
Pressure canners come with a removable rack, it is like a flat plate with holes in it.
Make sure the rack is actually in the canner before you add water and load the jars.
Your canners instructions will specify how much water it will need but generally it is about 3 inches.
Add even more water if the food will be processed for longer than 40 minutes so that it doesn’t run dry.
2. Turn On Heat If Hot Packing Jars
If the food will be hot when you fill the jars before processing, you can go ahead and turn the heat on under the canner and start heating up the water.
However if you are cold packing, you want to put the jars in to cold water.
Thermal shock will cause jars to shatter. Hot food in to hot jars in to hot water. Cold food in to cold jars in to cold water,
3. Fill Jars up and Place them in the Pressure Canner
Use your vegetables and fill clean canning jars, leaving ½ to 1-inch headspace – check your canning book for the specific amount for different foods.
A Note on Jars: Only use proper canning jars with the two piece lids. Check them over for cracks or chips and discard any that are damaged. Stick to well known brands like Ball, Mason, Perfit or Agee. Other jars may either explode or not seal correctly.
Wipe the rim of the jars clean and screw on 2-piece canning lids that fit your jars.
Tighten to what they call ‘fingertip tight’ basically as firmly as you can tighten them just holding the jar in one hand and only using the finger tips of the other to tighten.
So, tight, but not so tight you need real effort to undo it again as the lids will tighten on processing then cooling.
Use a jar lifter to lower the jars into the canner if they are hot. Hold the jars upright so that the food doesn’t get on the adhesive ring on the inside of the lids.
Leave a little space between the jars.
If you are cold packing, now is the time to turn on your canner.
4. Close Canner and Vent Steam for 10 Minutes
Once the water in the pot is nearly (or is) boiling, fasten the pressure canner lid on; how to do this varies depending on which brand you’ve got.
Leave the vent pipe or the petcock open.
Turn the heat on high if it isn’t already.
When steam begins to escape from the vent or petcock vigorously, start timing. Follow the manufacturer’s instructions for how long to allow the steam to exhaust, this is usually 10 minutes.
5. Raise Pressure and Process the Jars of Food
Put your weighted gauge on the vent or close the petcock, depending on the model of canner.
With the presto brand, then you need the little metal valve to pop up, if it doesn’t do this straight away, I find holding a tightly folded tea towel, or dry cloth, over it firmly for 5-10 seconds then removing it is sufficient to make it pop up. Sometimes it takes a couple of tries.
Now the pressure will start to go up, which you can see on the dial gauge or tell by when the weighted gauge starts to hiss and jiggle.
When the pressure specified by the recipe is reached (typically 10-12 lbs. of pressure), begin timing according to the recipe’s instructions.
Adjust the heat as necessary to maintain that level of pressure for the entire processing time.
I usually heat to pressure on high, then turn to about halfway for the rest of the processing time.
However, if the pressure ever goes below the specified amount, you will have to raise the heat to bring the pressure back up and start the processing time all over again from the beginning.
This is not optional it is about food safety.
RELATED POST: 30+ Old timey skills worth learning
6. Turn off the canner
Once your recipe’s time is completed turn the canner off and walk away.
7. Depressurise the Canner Before Opening
Leave the canner to cool until the gauge reads zero, then leave it for 5 more minutes (at least). The canner is not only cooling down during this time, it is also depressurising.
Remove the weight from the vent or open the petcock slowly. If there is any hissing sound when you start to do this, then the canner is not fully depressurized.
Leave it weighted or closed in that case and give it an additional 5 minutes of cool down/depressurizing time.
Once the weight is off or the petcock is open leave it a further 5-10 minutes for the pot and jars to get used to the new pressure.
If you rush this step, your jars will do what is called syphoning, and you will lose a lot of your liquid from the jars and risk them not sealing at all.
8. Open Pressure Canner and Carefully Remove Jars
Carefully open the canner lid in a way that you don’t steam yourself in the face.
Remove the jars with a jar lifter, being careful not to tilt them. I always wear an oven mitt and support the jars from the bottom as well, as I have had the jars slip from the jar lifter more than once!
Place the jars on a heat-resistant surface where they can remain undisturbed until the jars are completely cooled.
Leave them overnight if you can. After cooling, test the lids to verify that they are sealed. Label and store away from direct light and heat.
You can choose to leave the rings on or off. I tend to take them off then I can use them on other jars.
What foods need pressure canning?
Any low acid fruit or vegetable or meat based products like stew, or stock. You can use a pressure canner to preserve ready made meals that will be shelf stable even if it contains meat – like canned chicken from the store.
Other foods, including fruit, sweet preserves, and pickles can be safely canned in a boiling water bath without special equipment.
How long does it take a pressure canner to depressurize?
This depends on the model, what you had in it and how full it was. Usually mine depressurises in about 1 hour but it is best to leave it overnight if you can.
Do you cover jars with water when pressure canning?
You don’t need to, no. It is suggested that you start with about 3 inches of water on the base of the pot before you add the jars. Sometimes the water will cover the jars, but it doesn’t need to to be effective.
I love the Ball canning book recipes and instructions combined with my own canners recipe book.
![]()