This post was most recently updated on January 26th, 2021
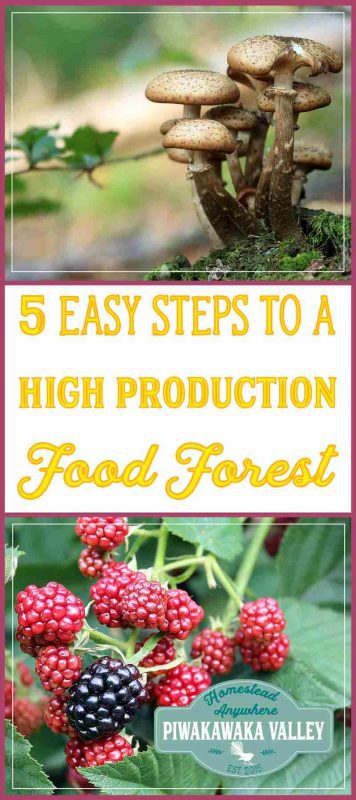
One of the most sustainable, long term ways of getting food out of your yard is by developing a food forest. Starting a food forest can seem like a complex thing, but really once you have designed the main food forest layout, you can continue to keep adding to your food forest over the coming months and years.
Please read: This information is provided for educational purposes only and is not intended to treat, diagnose or prevent any disease. We encourage you to make your own health care decisions in partnership with a qualified health care professional.
This post contains affiliate links, this means at no extra cost to you, we make a commission from sales. Please read our Disclosure Statement
Food forests are a complex mixture of plants that all have a role to play. It is built following the structure of a forest, but it is intentionally designed to provide food to the owners, and to be self sustaining.
Benefits to a Food Forest
There are many benefits to starting a food forest at your place, or in a community garden. Some of these benefits are as follows:
- Produces food with minimal input
- Produces forage for animals and serves as habitat for beneficial insects, pollinators, chickens, goats and song birds
- Creates a valuable wildlife habitat
- Provides nourishment and medicine for us through herbal teas and concoctions
- Creates beauty and sense of well being, a lovely place to go and spend time
- Creates shade and increase ambient humidity in hot dry summers
- Becomes a self sustaining eco system
Food Forest Layout: How to Grow a Food Forest in your Backyard – a step by step guide to starting a food forest
Step One – Watch your food forest area
The first step in creating a food forest layout is to watch your land closely. This step is crucial, because if you want to create an edible landscape that requires less work and maintenance, you need to grow species that are well adapted to your area, i.e. species that are volunteering to grow around your site.
Sun: You need to become familiar with your site, and your local area. Watch where the sun goes, where is sunny, where is the shade. How many hours of sun do you get in midwinter.
Water: Where does your rain fall go. Do you have ponds, swampy areas, dry patches, rivers that develop in downpours.
Wind: Where is your predominant wind. How windy is your site, where are the sheltered spots.
Cold: How cold and icy/snowy does your site get. When is your first and last frost. How hot does it get, do you get droughts.
Plants: Look at your garden, what grows well. What struggles. Look at local forests or other backyards, what sort of plants and trees grow well there.
Step Two – Draw a Map of your Food Forest
Either print off a google maps view of your section, or draw a rough plan on some paper. Add measurements and things that you observed from step one.
Place your permaculture zone areas on your map.
Step Three – Make a Plan for your food forest layout
In your plan, you need to put your non movable things in first – access ways, gates, fences, ponds, swales (mounds of dirt designed to slow down run off water), buildings/sheds, existing trees.
Here is a small model showing how swales work to slow down water runoff.
Food forests make the most of every layer and spot available to plants. Nature does not like bare ground, any bare patches will grow weeds. So any gaps you simply cover in deep mulch.
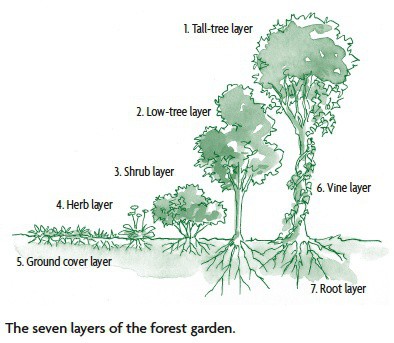
There are 7 layers that plants can take up:
Illustration from Gaia’s Garden by Toby Hemenway.
Make a big list of plants that fit in your food forest layout
The types you really want to grow and others necessary to fulfill a certain purpose in your food forest. Think about ecological functions needed throughout the garden such as food production, the gathering and retention of specific nutrients, beneficial insect nectar plants, and ground cover for weed control.
We have a list of plants suitable for growing a food forest here. Also have a read of our perennial plants list, they are also very suitable.
If there is a desired species that simply won’t work on your site, you can always find an equivalent, just ask Uncle Google.
Annuals that self seed are perfect to include in your food forest. You will need open pollinated or heirloom varieties for this to work.
We recommend that you get your annual seeds from Seeds for Generations as they are a homegrown, US family business specializing in heirloom seeds.
Create groups of plants that work well together. Try a nitrogen fixer tree between every two fruit trees. Then add some shrubs – berries or nuts are good choices. Then something to grow lower down again – maybe some comfrey or other herbs.
On your plan, make sure that you allow plenty of space for each tree – you don’t want their tops interlocking so much that the sunlight cannot get down to the other plants below. Look at the expected width of the bigger trees, and add 30% more room.
Step Four – Prepare your Land
If you need to get a digger in to move dirt or create paths or ponds NOW is the time to do so.
Look at creating swales on (or slightly off) contour – following what is level for your land. Ideally these mounds of soil (anything from 1-4ft high) will catch the water as it runs on the ground and slow it down.
Then they can direct it towards a pond, or the next swale. This is a great way to ensure this precious resource stays on your land as much as possible, and avoids the water washing away the top soil and all it’s nutrients.
Step Five – Plant your Plants
Start slowly. This isn’t a race. Buy and obtain plants as you can afford them. Look into growing your own from seed, or grafting your own trees.
As you plant your trees and their surrounding plants, mulch the area deeply. The aim is to re-create that amazing forest floor. Thick with mulch, and teeming with fungal and bacterial life.
Watch and observe as your plants grow (or die) and change things as you need to. Some plants may do better elsewhere, others just wont suit at all. Still more will do wonderfully at your place and you can divide them and plant more of them around.
Understand that often nature knows best, and unless a weed is particularly invasive or annoying, it may just be filling a much needed role right where it is, so try leaving it where it is.
Harvest and Maintain your Food Forest
As your plants grow and develop you can harvest from them. Fruit and nut trees may need to be pruned to increase yields and encourage good growth habits. For the first few years you will need to maintain a layer of mulch, but as the plants grow they will naturally start to mulch themselves.
If you like tips on frugal living, self sufficiency and consuming less, sign up to our newsletter below, I would LOVE to have you!
If you would like help getting the most out of your garden, I would love to help you, find out more here
RELATED: Free Gardening Resources
If you like tips on frugal living, self sufficiency and consuming less, sign up to our newsletter below, I would LOVE to have you
For further reading, I also recommend all of these books. I own every one of them and they are amazing resources!
Please Pin and Share with your friends!
