
If you’ve decided to grow your own vegetables this year, congratulations! You’re about to discover one of the most rewarding hobbies there is.
Growing vegetables from seed may seem intimidating at first, but it’s actually much easier than most people think. Every tomato, broccoli, lettuce and pumpkin starts life as a tiny seed, and with a little warmth, moisture and patience those tiny seeds quickly become productive plants.
Starting your own seedlings also gives you a huge advantage over buying them from a garden centre. You’ll save money, have access to hundreds more varieties and enjoy the satisfaction of watching your plants grow from the very beginning.
Please read: This information is provided for educational purposes only and is not intended to treat, diagnose or prevent any disease. We encourage you to make your own health care decisions in partnership with a qualified health care professional.
This post contains affiliate links, this means at no extra cost to you, we make a commission from sales. Please read our Disclosure Statement
Whether you’re growing vegetables in a backyard, raised beds or containers, this guide will walk you through every step—from choosing containers and seed raising mix through to transplanting healthy seedlings into your garden.
If you haven’t yet decided whether growing your own vegetables is right for you, I recommend reading the first article in this series before continuing.
RELATED: How to Start a Vegetable Garden from Scratch
Growing vegetables from seed is surprisingly simple. Most seedlings need 4–8 weeks before planting into the garden and require just four things: quality seed, a light seed-raising mix, consistent moisture and plenty of light. With the right conditions you’ll be harvesting healthy homegrown vegetables for a fraction of the cost of buying seedlings.
Contents
- Why Grow Vegetables from Seed?
- Benefits of Starting Your Own Seedlings
- Seeds vs Seedlings
- When Should You Start Seeds?
- What You’ll Need
- Choosing the Best Seed Raising Mix
- Potting Mix Safety
- Best Vegetables to Grow from Seed
- Step-by-Step Seed Starting Guide
- Watering Your Seedlings
- Light & Temperature
- Common Seed Starting Problems
- Potting Up Seedlings
- Hardening Off
- Planting into the Garden
- Common Beginner Mistakes
- Frequently Asked Questions
Why Grow Vegetables from Seed?
Buying seedlings is convenient, but growing your own from seed has a lot of advantages.
For starters, it’s much cheaper. A single packet of lettuce seed often costs about the same as one punnet of seedlings, yet it may contain hundreds of seeds. Even if only half germinate you’ll still end up with far more plants than you could ever buy for the same price.
You’ll also have access to varieties that most garden centres never stock. Heirloom tomatoes, colourful beetroot, giant pumpkins and unusual lettuces are all readily available as seed.
Perhaps the biggest reward, though, is watching something so tiny become food for your family.
There is something incredibly satisfying about harvesting vegetables that you’ve nurtured from the moment they first poked through the soil.
Benefits of Starting Your Own Seedlings
| Buying Seedlings | Growing from Seed |
|---|---|
| Higher cost | Very economical |
| Limited varieties | Hundreds of varieties |
| Convenient | Longer growing season |
| No control over how they were raised | You control the entire growing process |
Seeds vs Seedlings
If you’re completely new to gardening, don’t feel like you have to grow absolutely everything from seed.
I actually recommend a mixture.
Grow easy crops like broccoli, cabbage, lettuce, kale and silverbeet from seed while buying a few seedlings of anything you’re unsure about.
Every season you’ll gain confidence and before long you’ll probably find yourself buying fewer and fewer seedlings.
If you live in New Zealand and are looking for quality seed, I’ve always had good experiences with Kings Seeds.
When Should You Start Seeds?
If you’re planning on growing a vegetable garden this year, early to mid spring is an excellent time to start many vegetables in seed trays ready for planting out later in spring once the danger of frost has passed.
Most vegetables need somewhere between four and eight weeks before they’re large enough to transplant into the garden.
Exactly when you should sow depends on:
- Your local climate.
- Your last expected frost.
- The vegetable you’re growing.
- Whether you’re growing inside, in a greenhouse or outdoors.
Sowing too early often creates large, overgrown seedlings that become rootbound before conditions outside are suitable. Sowing too late simply delays your harvest.
| Vegetable | Typical Time Before Planting Out |
|---|---|
| Lettuce | 4 weeks |
| Broccoli | 4–6 weeks |
| Tomatoes | 6–8 weeks |
| Capsicums & Peppers | 8–10 weeks |
| Pumpkins & Zucchini | 3–4 weeks |
What You’ll Need
The good news is you don’t need expensive equipment to raise excellent seedlings.
When I first started, I used whatever containers I already had around the house, and they worked perfectly well.
Avoiding unnecessary plastic is something I try to do where possible, but reusing containers you already own is one of the best ways to keep them out of landfill.
You’ll need:
- A seed tray or recycled container.
- Seed raising mix or potting mix.
- Seeds.
- Plant labels.
- A spray bottle or fine watering can.
Almost anything can become a seed tray.
I’ve successfully used grape boxes, old plastic storage bins, mushroom trays and ice cream containers. The only real requirements are that they won’t go soggy and can hold approximately 8–12cm (3–5 inches) of seed raising mix.
Choosing the Best Seed Raising Mix
The growing medium you choose plays a surprisingly important role in how well your seeds germinate.
Seeds need a balance of moisture, oxygen and warmth. A good seed raising mix holds enough water to keep the seed hydrated while still allowing plenty of air around the developing roots.
You can buy specialised seed raising mix from most garden centres, or simply use a quality potting mix. Seed raising mixes are generally finer, making it easier for delicate seedlings to push through the surface.
Personally, I’ve raised thousands of seedlings using inexpensive potting mix from our local garden centre. It isn’t the most glamorous option, but it works remarkably well.
As I continue improving my own garden, my goal is to eventually make all of my own seed raising mix using screened compost mixed with fine garden soil. Homemade mixes can produce excellent seedlings once you have good compost available.
| Seed Raising Mix | Potting Mix |
|---|---|
| Fine texture | Usually coarser |
| Excellent for tiny seeds | Suitable for most vegetables |
| More expensive | Usually cheaper |
| Designed for germination | Good all-round option |
Potting Mix Safety
This is one piece of gardening advice that has become much more widely recognised in recent years.
If you’re using commercial potting mix or seed raising mix, always wear gloves and a well-fitting mask when opening and handling the bag.
Commercial potting mixes can occasionally contain naturally occurring Legionella bacteria. If contaminated dust is inhaled it can cause Legionnaires’ disease, a potentially serious type of pneumonia.
The risk is relatively low, but the consequences can be severe, and protecting yourself only takes a few moments.
Open bags outdoors if possible, avoid breathing dust, lightly dampen dry potting mix before using it, wear gloves and wash your hands thoroughly afterwards.
When I first wrote this article there had recently been a local death linked to Legionnaires’ disease. That really reinforced for me that this simple precaution is worth taking every single time.
The Best Vegetables to Grow from Seed
Some vegetables are incredibly easy to grow from seed, making them perfect for beginners.
If this is your first year gardening, start with crops that germinate reliably and transplant well.
| Vegetable | Difficulty | Comments |
|---|---|---|
| Broccoli | ★★★★★ | Very reliable |
| Cabbage | ★★★★★ | Excellent beginner crop |
| Lettuce | ★★★★★ | Fast growing |
| Silverbeet / Swiss Chard | ★★★★★ | Very productive |
| Kale | ★★★★★ | Hardy and forgiving |
| Spinach | ★★★★☆ | Likes cooler weather |
| Beetroot | ★★★★☆ | Easy to grow |
| Leeks | ★★★★☆ | Worth the wait |
| Parsley | ★★★☆☆ | Slow to germinate |
| Basil | ★★★☆☆ | Needs warm conditions |
Flowers deserve a place in the vegetable garden too.
Marigolds are one of my favourites because they’re easy to grow from seed, brighten the garden and attract beneficial insects and pollinators.
Beans and peas can certainly be started in trays, but I’ve found they usually grow faster and stronger when they’re sown directly into the garden.
One exception is carrots and parsnips. These vegetables develop long taproots and dislike being transplanted. Unless you’re feeling adventurous, it’s much easier to sow them directly where they’ll grow.
How to Grow Vegetables from Seed Successfully
Now comes the enjoyable part—actually sowing your seeds.
Although every vegetable is slightly different, the basic process is almost exactly the same whether you’re growing broccoli, lettuce, tomatoes or pumpkins.
Step 1 – Prepare Your Tray
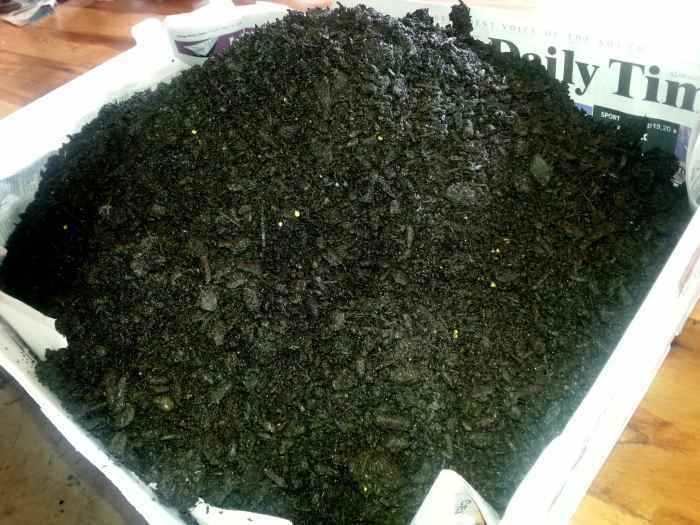
If your tray has large drainage holes, line the bottom with four or five sheets of newspaper before adding the seed raising mix.
The newspaper stops the mix falling straight through while still allowing excess water to drain away.


Step 2 – Put on Your Safety Gear
Before opening your bag of potting mix, put on your gloves and mask.
It might seem a little over the top, but it takes less than a minute and protects you from inhaling potentially harmful dust.
Step 3 – Fill the Tray
If your mix feels dry and dusty, lightly dampen it first.
Fill your tray with approximately 8cm (3 inches) of mix before gently firming the surface with your hand or a trowel.
Step 4 – Level the Surface
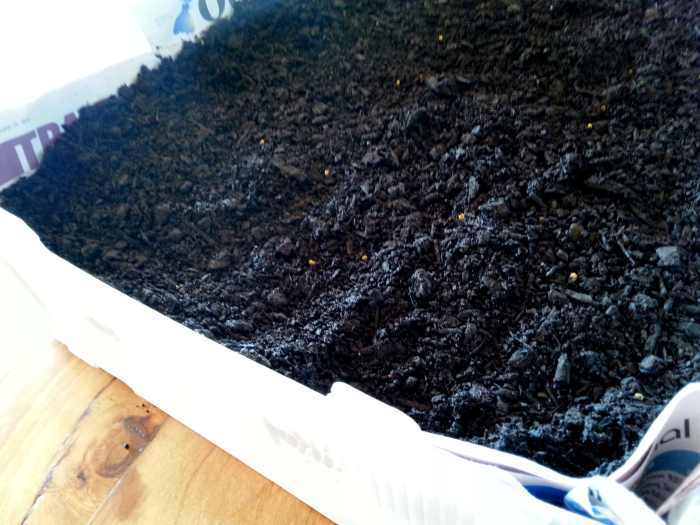
A reasonably level surface helps you sow seeds at an even depth, giving much more consistent germination.
Step 5 – Make Planting Rows or Holes
Now it’s time to make somewhere for your seeds to go.
For small seeds like broccoli, cabbage, lettuce and kale, make shallow rows about 5cm (2 inches) apart and approximately 5–10mm (¼–½ inch) deep. I simply use my finger to make these rows.
Larger seeds such as zucchini, pumpkins and squash are better planted individually in holes around 3–5cm (1–2 inches) deep.
A marker pen, dibber or even a thick stick works perfectly for making these planting holes.
As a general rule, sow seeds at a depth of around twice the width of the seed unless the packet gives different instructions.
Step 6 – Sow Your Seeds
For tiny seeds, sprinkle them evenly along each row before lightly covering them with seed raising mix.
Don’t worry too much about getting perfect spacing at this stage.
Very few packets ever achieve a 100% germination rate, especially if the seed is a couple of years old. It’s much easier to thin out extra seedlings than it is to magically create plants that never germinated.
For larger seeds, place one seed into each hole before covering with soil and gently firming the surface.
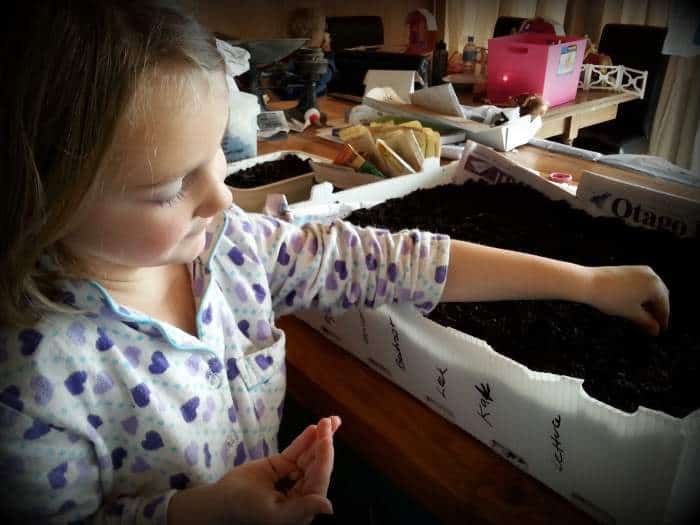 Gardening doesn’t require fancy clothes—yes, she’s still in her pyjamas!
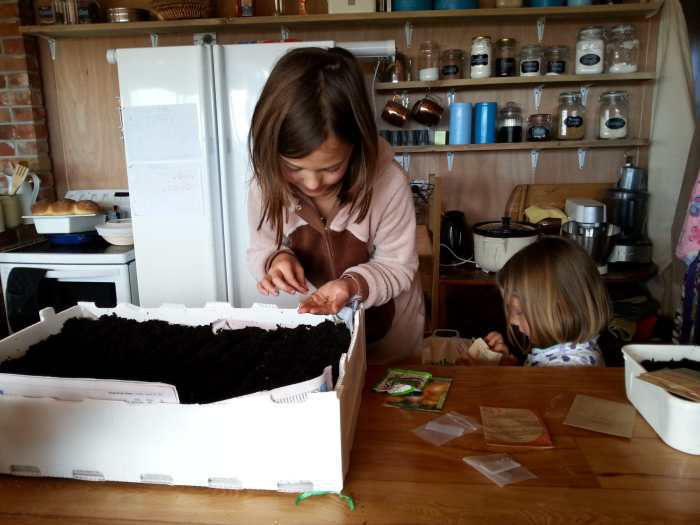
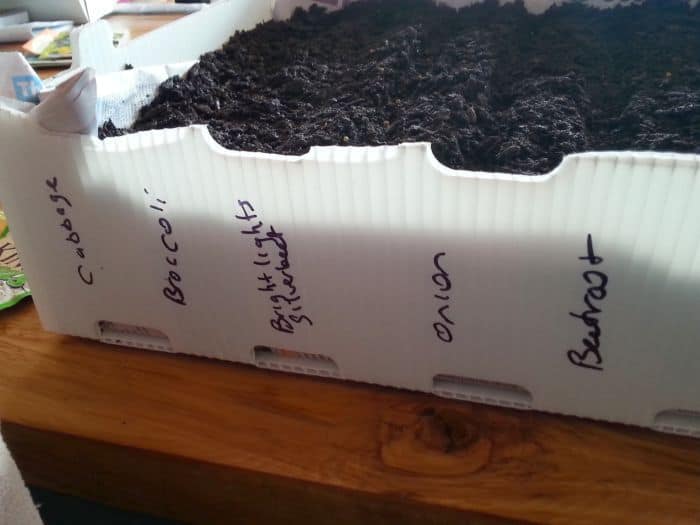
Step 7 – Label Everything
This is one step you’ll only forget once.
After a week or two, almost every tray of seedlings starts looking remarkably similar. Unless you’ve labelled them, you’ll quickly find yourself trying to remember which row contains broccoli and which contains cabbage.
Use whatever you have available:
- Wooden craft sticks
- Commercial plant labels
- Old ice cream container lids cut into strips
- Plastic labels from previous years
At the same time, I recommend starting a gardening journal.
Write down:
- The date you sowed the seeds.
- The variety.
- Where you purchased the seed.
- How well it germinated.
- When it was transplanted.
- How productive it was.
After a few seasons you’ll have an incredibly valuable record of exactly what performs well in your own garden.
If you’d like a dedicated place to keep all your gardening notes, I highly recommend keeping a garden diary.
Step 8 – Water Gently
Freshly sown seeds need consistent moisture to germinate, but they certainly don’t want to be blasted with a heavy stream of water.
A spray bottle is ideal because it wets the soil without washing tiny seeds into the corners of the tray.
If you’re using a watering can, make sure it has a fine rose fitted.
Your seed raising mix should feel like a well-wrung sponge—consistently damp but never waterlogged.
Step 9 – Give Your Seeds the Right Conditions
Place your trays somewhere warm with plenty of bright light.
Before germination, warmth is usually more important than direct sunlight.
Once seedlings emerge, however, they need plenty of light to prevent becoming tall, thin and weak.
I usually place mine somewhere they receive lots of bright natural light without sitting in harsh afternoon sun that dries the trays out too quickly.
Check your trays every day.
Some vegetables can germinate within only a few days, while others may take several weeks depending on the variety and temperature.
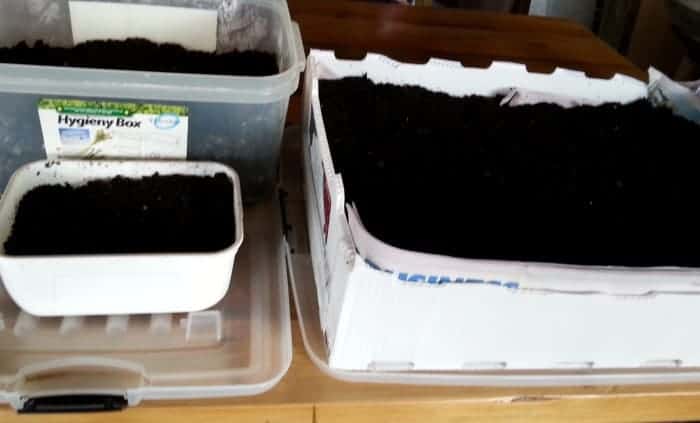
My trays are sitting on old toy box lids to protect the benchtop while the seedlings grow.
How Much Water Do Seedlings Need?
Overwatering kills just as many seedlings as underwatering.
Seeds need moisture to germinate, but they also need oxygen. Soil that remains saturated for long periods encourages fungal diseases and root problems.
| If the Soil Looks… | What To Do |
|---|---|
| Light and dry | Mist gently |
| Dark and evenly moist | Leave it alone |
| Waterlogged | Allow to drain and reduce watering |
Rather than watering on a schedule, simply check your trays every day. Weather, temperature and humidity all affect how quickly they dry out.
Light and Temperature
Once seedlings emerge, plenty of light becomes essential.
If they don’t receive enough light they’ll stretch upwards searching for it. This creates long, weak stems that often fall over—a problem gardeners call leggy seedlings.
Leggy seedlings are almost always caused by insufficient light rather than poor seed quality.
A bright windowsill, greenhouse, tunnel house or grow light all work well.
If you’re using a windowsill, rotate your trays every few days so seedlings grow upright instead of leaning towards the light.
| Crop Type | Ideal Germination Temperature |
|---|---|
| Cool season vegetables (lettuce, broccoli, cabbage) | 10–20°C (50–68°F) |
| Warm season vegetables (tomatoes, peppers, basil) | 20–30°C (68–86°F) |
Always check the information on your seed packet, as different vegetables have slightly different preferences.
If your home is cool, placing seed trays somewhere consistently warm can make a huge difference to germination rates.
Common Seed Starting Problems
Every gardener loses seedlings occasionally. Don’t let it discourage you—most problems are easy to solve once you know what causes them.
| Problem | Most Likely Cause | Solution |
|---|---|---|
| Seeds won’t germinate | Too cold, too dry or old seed | Increase warmth and keep evenly moist |
| Leggy seedlings | Insufficient light | Move to brighter conditions immediately |
| White mould | Poor airflow and excessive moisture | Improve ventilation and reduce watering |
| Seedlings suddenly collapse | Damping off disease | Improve airflow and avoid overwatering |
| Yellow leaves | Overwatering or lack of nutrients | Adjust watering and pot seedlings on if needed |
Remember that even experienced gardeners don’t achieve perfect germination every time.
Some years the weather is against us, some packets of seed are simply old, and occasionally things just don’t go to plan. Gardening is a continual learning process, and every season teaches you something new.
Potting Up Seedlings
Eventually your seedlings will outgrow their original tray.
Once they develop their first true leaves (the second set of leaves that appear), they’re usually ready to move into individual pots.
The first leaves that emerge are called cotyledons or seed leaves. They’re part of the seed itself and don’t look like the mature leaves the plant will eventually produce.
Once the true leaves appear, the seedling has established enough to cope with being transplanted.
Fill small pots with fresh potting mix and make a hole down the centre using a pencil or dibber.
Carefully lift each seedling using a knife, spoon or plant label.
Always handle seedlings by their leaves rather than their stems. If you accidentally damage a leaf the plant can usually grow another one. If you crush the stem, the seedling is unlikely to recover.
Place the roots into the hole, gently firm the soil around them and water thoroughly.
Peat pots are excellent because they can be planted directly into the garden, reducing root disturbance. Reused six-cell or twelve-cell nursery trays also work perfectly well and are a great way to recycle.
Peat pots are ideal for this stage, although reused nursery cell trays work just as well.
Hardening Off Your Seedlings
One step that’s often skipped by beginners is hardening off.
Seedlings raised indoors, in a greenhouse or tunnel house have enjoyed fairly constant temperatures, protection from wind and filtered sunlight.
If they’re suddenly planted outside into full sun, strong winds or cold nights they can become badly stressed.
Hardening off gradually introduces your seedlings to outdoor conditions over seven to ten days.
| Day | What to Do |
|---|---|
| 1–2 | Place outside in shade for 1–2 hours. |
| 3–4 | Increase outdoor time and morning sun. |
| 5–7 | Leave outside most of the day. |
| 8–10 | Ready for planting into the garden. |
If frost is still possible, bring your seedlings back inside each evening during the hardening-off period.
Planting Seedlings into the Garden
Once your seedlings have developed six to eight true leaves and have been hardened off, they’re ready for their permanent home.
Choose a cool, cloudy day if possible, or plant in the evening when the hottest part of the day has passed.
Dig a hole slightly larger than the root ball.
Carefully remove the seedling from its pot, keeping as much soil around the roots as possible. If you’re using biodegradable peat pots, you can plant the whole pot directly into the ground.
Backfill around the roots, gently firm the soil and water thoroughly.
Finally, apply a generous layer of mulch around the plant to help conserve moisture, suppress weeds and protect the soil.
RELATED: Benefits of Mulching Your Vegetable Garden
10 Common Seed Starting Mistakes Beginners Make
Everyone makes mistakes when they first start growing vegetables from seed. Fortunately, most are easy to avoid once you know what to look for.
| Mistake | How to Avoid It |
|---|---|
| Overwatering seedlings | Keep the mix damp, not saturated. |
| Starting seeds too early | Count backwards from your planting-out date. |
| Not enough light | Move seedlings into bright light immediately after germination. |
| Planting seeds too deeply | Follow the seed packet or sow at roughly twice the seed’s width. |
| Using old seed | Check dates and sow a few extra if you’re unsure. |
| Forgetting labels | Label every tray immediately. |
| Skipping hardening off | Gradually introduce seedlings to outdoor conditions. |
| Leaving seedlings rootbound | Pot them up before roots completely fill the container. |
| Handling seedlings by the stem | Always lift by the leaves. |
| Giving up after one failure | Gardening is a skill—every season you improve. |
Frequently Asked Questions
How long does it take vegetable seeds to germinate?
Most vegetable seeds germinate within 5–14 days, although some varieties can sprout in just a few days while others may take several weeks depending on temperature and moisture.
Can I use ordinary garden soil for starting seeds?
It’s possible, but it’s usually not the best choice. Garden soil can compact easily, contain weed seeds and sometimes carry diseases. A quality seed raising mix or potting mix generally produces much more reliable results.
Should I soak vegetable seeds before planting?
Some larger seeds, such as peas and beans, can benefit from soaking overnight. Most vegetable seeds, however, germinate perfectly well without soaking.
How often should I water seedlings?
Check them daily. Water whenever the surface begins to dry, but avoid keeping the mix constantly saturated.
Why are my seedlings tall and floppy?
This is almost always caused by insufficient light. Move seedlings into brighter conditions as soon as they emerge.
When should I fertilise seedlings?
Once seedlings have developed several true leaves, a weak liquid fertiliser or compost tea every week or two can help support healthy growth.
Can I reuse old seed trays?
Absolutely. Wash them thoroughly before reusing them to reduce the chance of spreading diseases from previous crops.
How do I know when seedlings are ready to transplant?
Most vegetables are ready once they have several true leaves, sturdy stems and a healthy root system that holds the potting mix together when removed from the container.
Is it worth growing vegetables from seed?
Definitely. Growing from seed saves money, provides access to many more varieties and is one of the most rewarding parts of vegetable gardening.
What’s the easiest vegetable to grow from seed?
Lettuce, broccoli, cabbage, kale, silverbeet, beans and peas are all excellent choices for beginners because they germinate reliably and are generally forgiving.
Final Thoughts
Growing vegetables from seed isn’t difficult—it simply requires a little patience and consistency.
Don’t worry if your first tray isn’t perfect. Every experienced gardener has lost seedlings, forgotten labels or planted something far too early at some point.
The important thing is to start.
Every season you’ll become more confident, learn what works in your own garden and discover the varieties you enjoy growing the most.
Before long you’ll wonder why you ever bought seedlings in the first place.
Continue the Gardening for Beginners Series
- Episode 1 – Starting a Vegetable Garden from Scratch
- Episode 2 – How to Grow Vegetables from Seed
- Episode 3 – How to Plant Seedlings Successfully








Please Pin and Share with your friends and family!
Read here if you missed the first episode of growing a garden from scratch.
EPISODE 3 – How to grow herbs and tubers