This post was most recently updated on September 8th, 2020
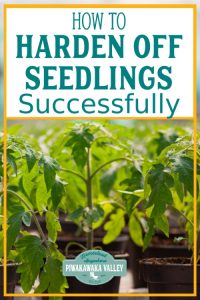
Plants need plenty of time to grow from seedlings to being mature enough to put in to the garden. The process of moving the seedlings from indoors to the outdoors to expose them to the natural sunlight, wind, and extremes of temperature is known as ‘hardening off’. This post will show you just what you need to do to harden off seedlings before transplanting them in your garden.
Please read: This information is provided for educational purposes only and is not intended to treat, diagnose or prevent any disease. We encourage you to make your own health care decisions in partnership with a qualified health care professional.
This post contains affiliate links, this means at no extra cost to you, we make a commission from sales. Please read our Disclosure Statement
Most of the fruit-bearing plants for your vegetable garden are sown inside during the winter season and are transplanted when the spring arrives.
Most fruiting vegetables are frost-tender which is why gardeners have to plant the seedlings indoors to prevent them from freezing/dying.
Hardening off seedlings is a gradual process where the seedlings have to get accustomed to the sunlight and the cool climate at night slowly, allowing time for them to become more hardy and resilient.
RELATED: Growing for beginners
Can’t be bothered reading? Check out the video:
Here is a step by step approach to hardening off the seedlings and transplanting them to an outside area.
1. Check the frost dates
Most of the plants that bare fruit (tomatoes, peppers, cucumbers, pumpkins, squash, zucchini, eggplants etc) are unable to endure the cold temperatures that winter and early spring bring.

This is why it is important to check your own last frost dates before you harden the seedlings. A late frost will simply kill this type of plant in one night.
Once you know your last frost date, it is best to allow a couple more weeks, just to be safe. If you aren’t sure, ask a local gardener, they are likely to know.
You can mark the dates that are tentative to harden off the seedlings on the calendar and accordingly arrange to transplant them in the weeks that follow.
2. Ease up on the watering
As mentioned earlier, hardening off the seedlings is a gradual process where the seeds need to get accustomed to the natural air and sunlight.
Your first job will be to slow down the rate that you are watering the seedlings a week before they are taken outside.
If you water every day, slowly swap to every other day, then every third, then only 1-2 times per week.
Do not provide any supplemental food to fertilize the seedlings.
RELATED: How to start seeds the right way
3. Keep them in a protected place outside
This is a very crucial stage of hardening off seedlings.
Since the seedlings will be exposed to the sun and wind for the first time, it will be wise to protect them initially.
It will be best to have a shady spot that does not allow direct sun rays to land on the seedlings , and somewhere out of the wind.
You can use a spot under a seed table or in a cold frame/cloche.
In the edge of a mature garden under the shade and shelter of big shrubs or trees is another great option.
If you are new to gardening, or want some support and knowledge getting a garden started, let me help!
4. Placing the seeds in the hardening off spot
You will have to keep the seedlings outside for just an hour or two and not more than that on the first day.
Choose a mild day with not too much wind or pouring rain.
Place the seedlings in the hardening off spot during the early or late afternoon and move them back inside before dinner.
If there is too much wind around, make sure that the seedlings are well protected and don’t get blown over due to the wind.
Also, the sun’s rays should not fall directly on the plant and the area must be free from animals, insects, and pests.
RELATED: How to save tomato seeds for next season
5. Bring the plants back inside
It is important to bring the plants back inside once the first day of exposure is finished.
You should not let the seedlings get exposed to the air and sun for more than two hours for the first few days.
If the temperature is very high or terribly cold outside, you should consider keeping them outside for only an hour and not more than that.
Then bring them back in to the environment that they are used to inside.
RELATED: Free Gardening Resources
6. Increase the hardening off time
You should increase the hardening off time gradually. If the seedlings were exposed to the sunlight for one hour on the first day, increase that to two hours on the second day, three hours on the third day, and so on.
Keep increasing the time for which the seedlings remain outside by one hour every day or every other day.
Also, from the third or fourth day onwards, you can remove the shade and let them be exposed to the direct rays. By then, the seedlings will start to harden off and become more prepared to be planted out.
7. Protect the seedlings as required
If you notice any change in temperature after the seedlings have been placed outside, use your common sense, if it is freezing cold, you can bring them in early.
8. Plant out the seedlings
After 10-14 days of hardening off, your plants should be ready to transplant outside for real this time.
Give them a good soak in some water laced with seasol, and transplant them into a weed-free, well composted area.
Many gardeners use row covers that can protect the plants from the fluctuating temperature outside until they are well established.
The basic idea is to protect the seedlings from a sudden dip in temperature or heavy rainfall. Depending on the area that you have and the number of seedlings, you can choose between floating row cover and a hooped row cover.
Both have the ability to protect the seedlings from the sudden change in temperature.
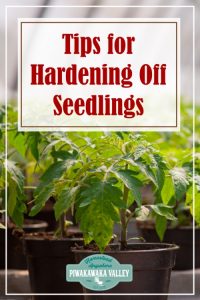
Tips for hardening off your seedlings
Gardeners will often use a wheelbarrow or wagon to move in and move out the plants during the first few days so you don’t have to carry each tray individually.
Personally, I place the smaller 6 or 8 cell seedling trays inside larger plastic trays so I can carry 10 or so at once.
Also, keep slugs and snails away from the seedlings when they are hardening off.
You can use a scarecrow to keep the birds away, or cover with row covers. Wild birds are attracted to freshly dug soil as it makes the worms easy to get. They will have no regard for your new seedlings and will easily dig them out to get to the yummy worms!
If you would like help getting the most out of your garden, I would love to help you, find out more here
RELATED: Free Gardening Resources
If you like tips on frugal living, self sufficiency and consuming less, sign up to our newsletter below, I would LOVE to have you
For further reading, I also recommend all of these books. I own every one of them and they are amazing resources!

![]()

![]()

![]()
![]()

![]()